🔒 Security Reminder: SecuX will never ask for your 24-word recovery phrase.
Looking for help?
Find answers to your questions
- 1. Before You Start
- 2. Beginner Safety Guide (Safety and Security Information)
- 3. Set up a New V20 Wallet
-
Device Functions
DApps / Platforms
- Buy Crypto on Coinify on Web
- Connect to MetaMask Using QR-based
- Send or Swap Crypto Using MetaMask
- WalletConnect for DApps
- Withdraw from Binance to SecuX on Web
- Withdraw from Coinbase to SecuX on Web
- Assign and Remove a FIO Crypto Handle
- FIO Request
- Register a FIO Crypto Handle
- Register a FIO Domain
- Renew a FIO Domain
- Send to a FIO Crypto Handle
- Ada Portal — WEB
- Manage EVM Chains
- Receive Funds on SecuXess
- Send Funds on Web
- Send NFTs on SecuXess
- Add Accounts on Mobile
- Add Accounts on SecuXess
- Manage ERC-20 Tokens on Web
- Manage Tokens on Web
- Manage TRC-10/ 20 Tokens on Web
- 1. Before You Start
- 2. Beginner Safety Guide (Safety and Security Information)
- 3. Set up a New W10 Wallet
- 4. Connect W10 to Computer via USB
-
Device Functions
DApps / Platforms
- Buy Crypto on Coinify on Web
- Withdraw from Binance to SecuX on Web
- Withdraw from Coinbase to SecuX on Web
- Ada Portal — WEB
- Manage EVM Chains
- Receive Funds on SecuXess
- Send Funds on Web
- Send NFTs on SecuXess
- Add Accounts on SecuXess
- Manage ERC-20 Tokens on Web
- Manage Tokens on Web
- Manage TRC-10/ 20 Tokens on Web
- 1. Create a New Wallet
- 2. Safety Guide
- 3. Device Setting
- 4. Download App
- 5. FCC Statement
-
DApps
NFTs
- Add to Favorites
- Display NFTs on Wallet
- Hide NFTs
- Manage NFT Gallery on SecuX Wallet App
- Receive NFTs
- Send NFTs
- Share NFTs
- View and Manage NFTs
- Add a New Wallet
- Connect / Disconnect Device
- Edit Wallet Name
- Firmware Check
- Remove Wallet
- Switch Wallet
- Blockchain Questions
- Crypto support
- Device Setup
- How SecuX’s NFT Wallet is Absolutely Changing NFT Storage Forever
- How to Store Shiba Inu Tokens in a SecuX Hardware Wallet
- Introducing SecuX’s Steel Crypto Wallet: The ‘X-Seed’
- Manage Solana (SOL) and Solana SPL tokens on SecuX V20, W20 and W10.
- Payment / Order / Shipment
- Security Questions
- SecuXess / SecuX Mobile App
- Send / Receive / Transactions
- Transaction / Network Fees
- USB / Bluetooth Connections
- Wallet and Device Issues
2. User Guide
Table of Contents
SecuX Authenticator – How It Works
SecuX Authenticator is a desktop application used to manage and configure your SecuX PUFido security key. The application provides a secure interface to manage passkeys, PIN protection, and device settings, ensuring your authentication credentials remain protected inside the hardware device.
Follow the steps below to set up and manage your SecuX PUFido key.
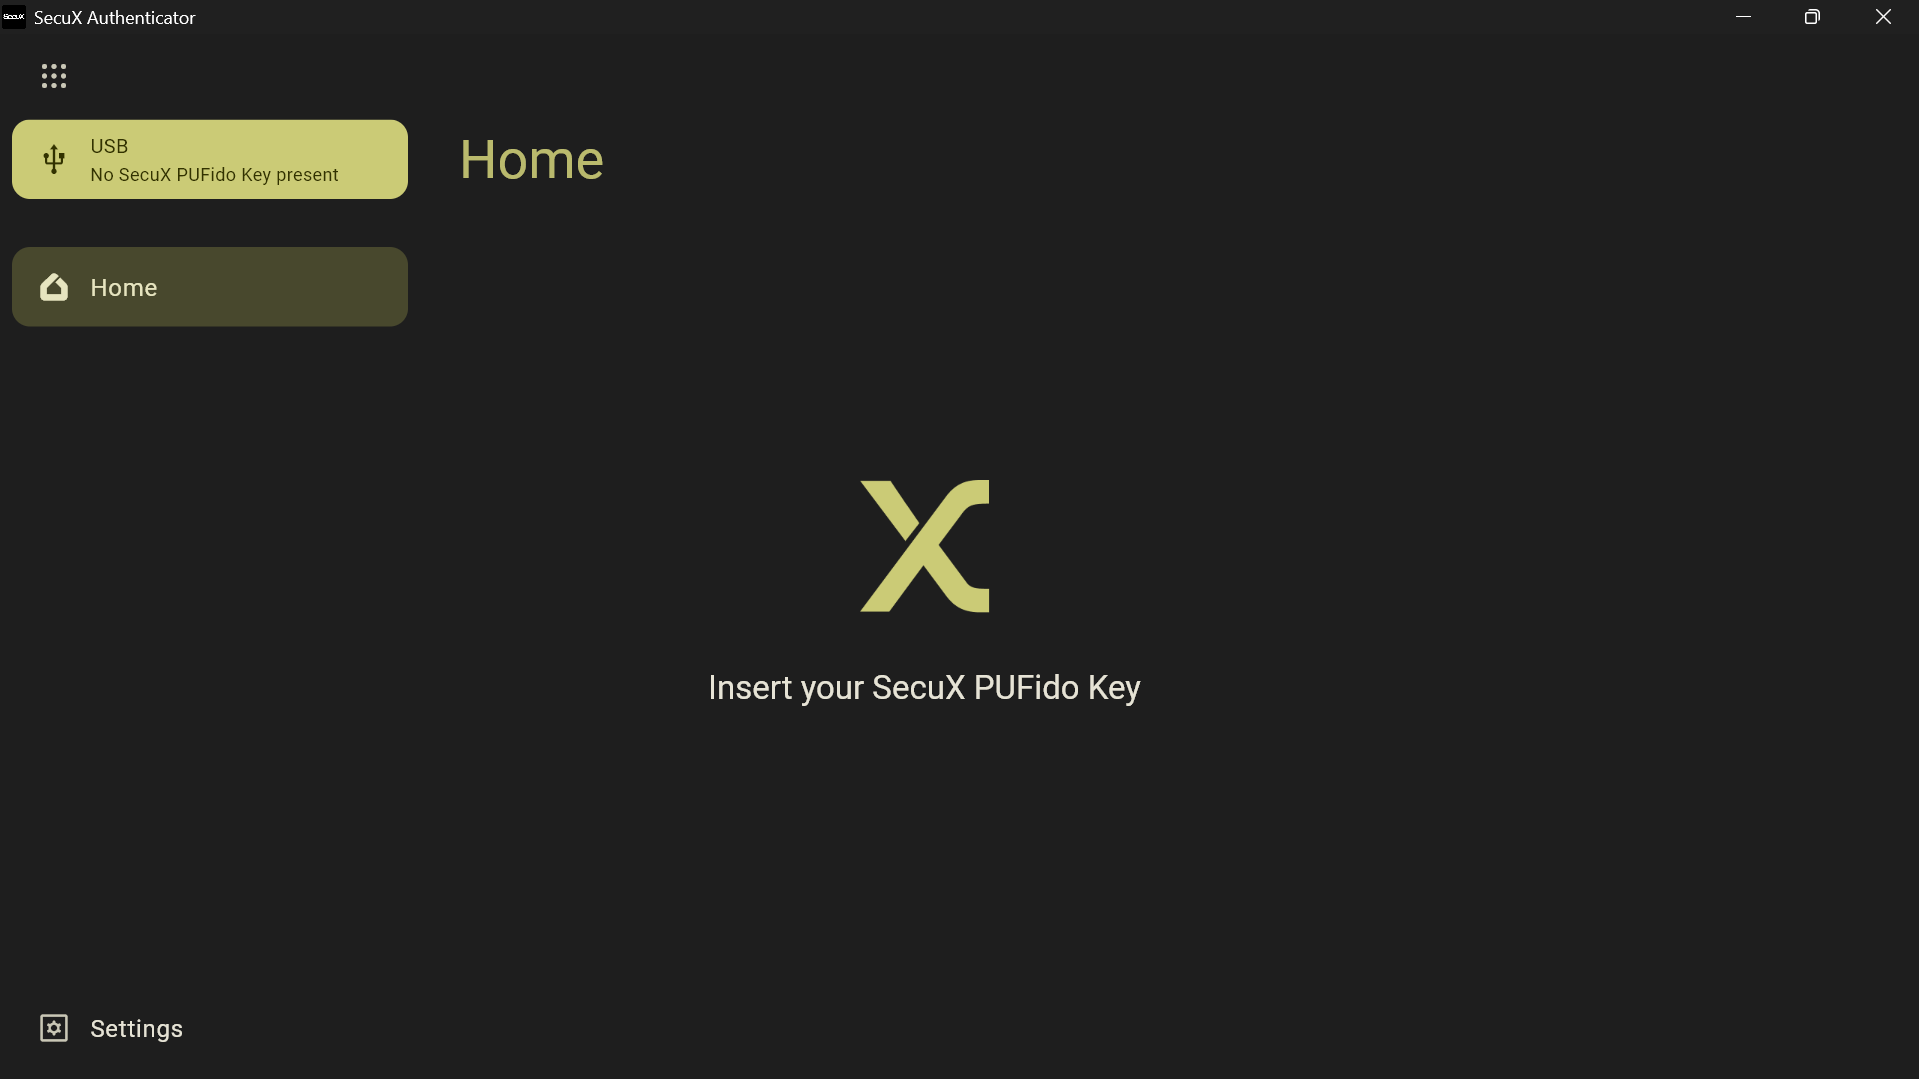
Launch the SecuX Authenticator Application
Start by opening the SecuX Authenticator desktop application on your computer.
When the application launches, the main screen will prompt you to insert your SecuX PUFido key.
At this stage, the application is waiting for a compatible security key to be connected.
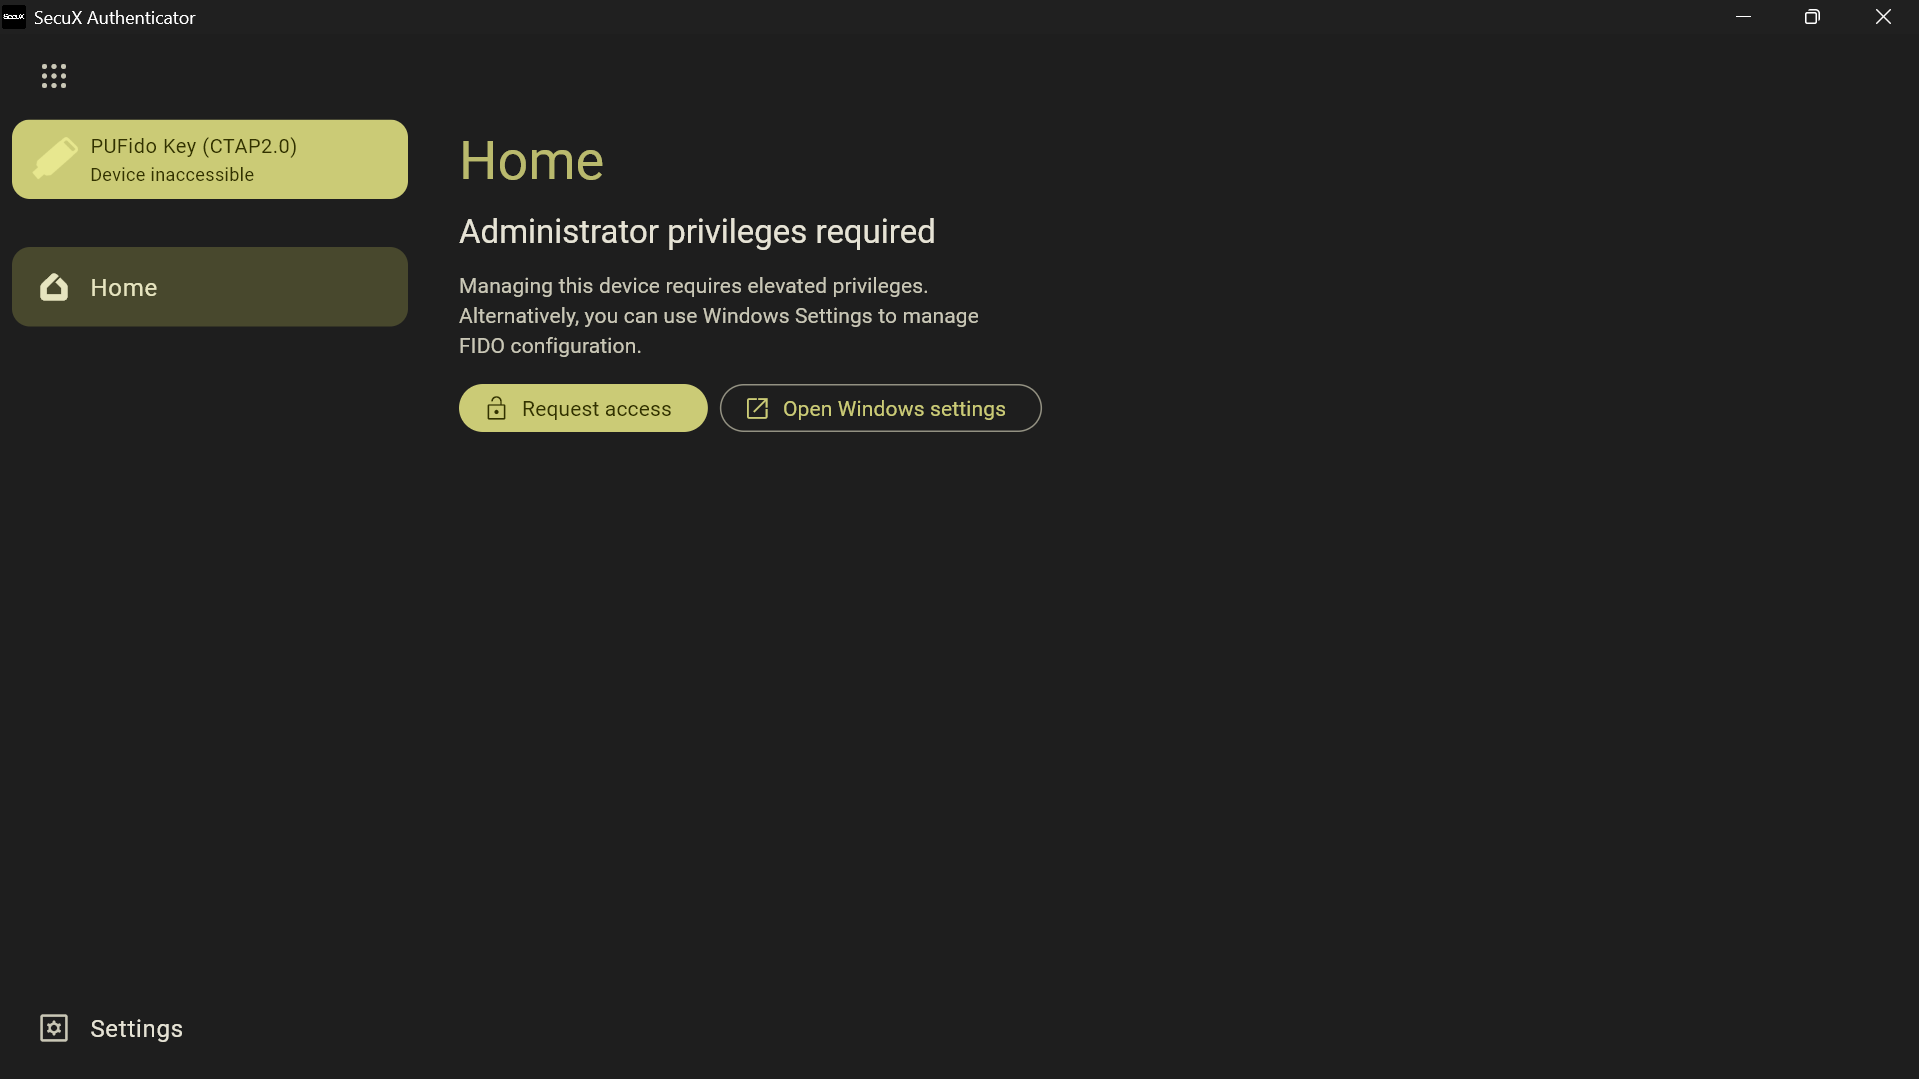
Connect Your SecuX PUFido Key
Insert your SecuX PUFido key into an available USB port on your computer.
Once connected, the application will automatically detect the device and establish communication with it.
The application interface will then display information about the connected device, including:
- Device name
- Firmware version
- Supported authentication protocols
- Device status
This confirms the key is successfully connected and ready for configuration.
Create a Security PIN (First-Time Setup)
When using the device for the first time, you will be prompted to create a security PIN.
The PIN protects access to the FIDO2 authentication functions stored on the device.
Steps to create a PIN
- Select Set PIN.
- Enter a new PIN in the provided field.
- Confirm the PIN by entering it again.
- Click Save to complete the setup.

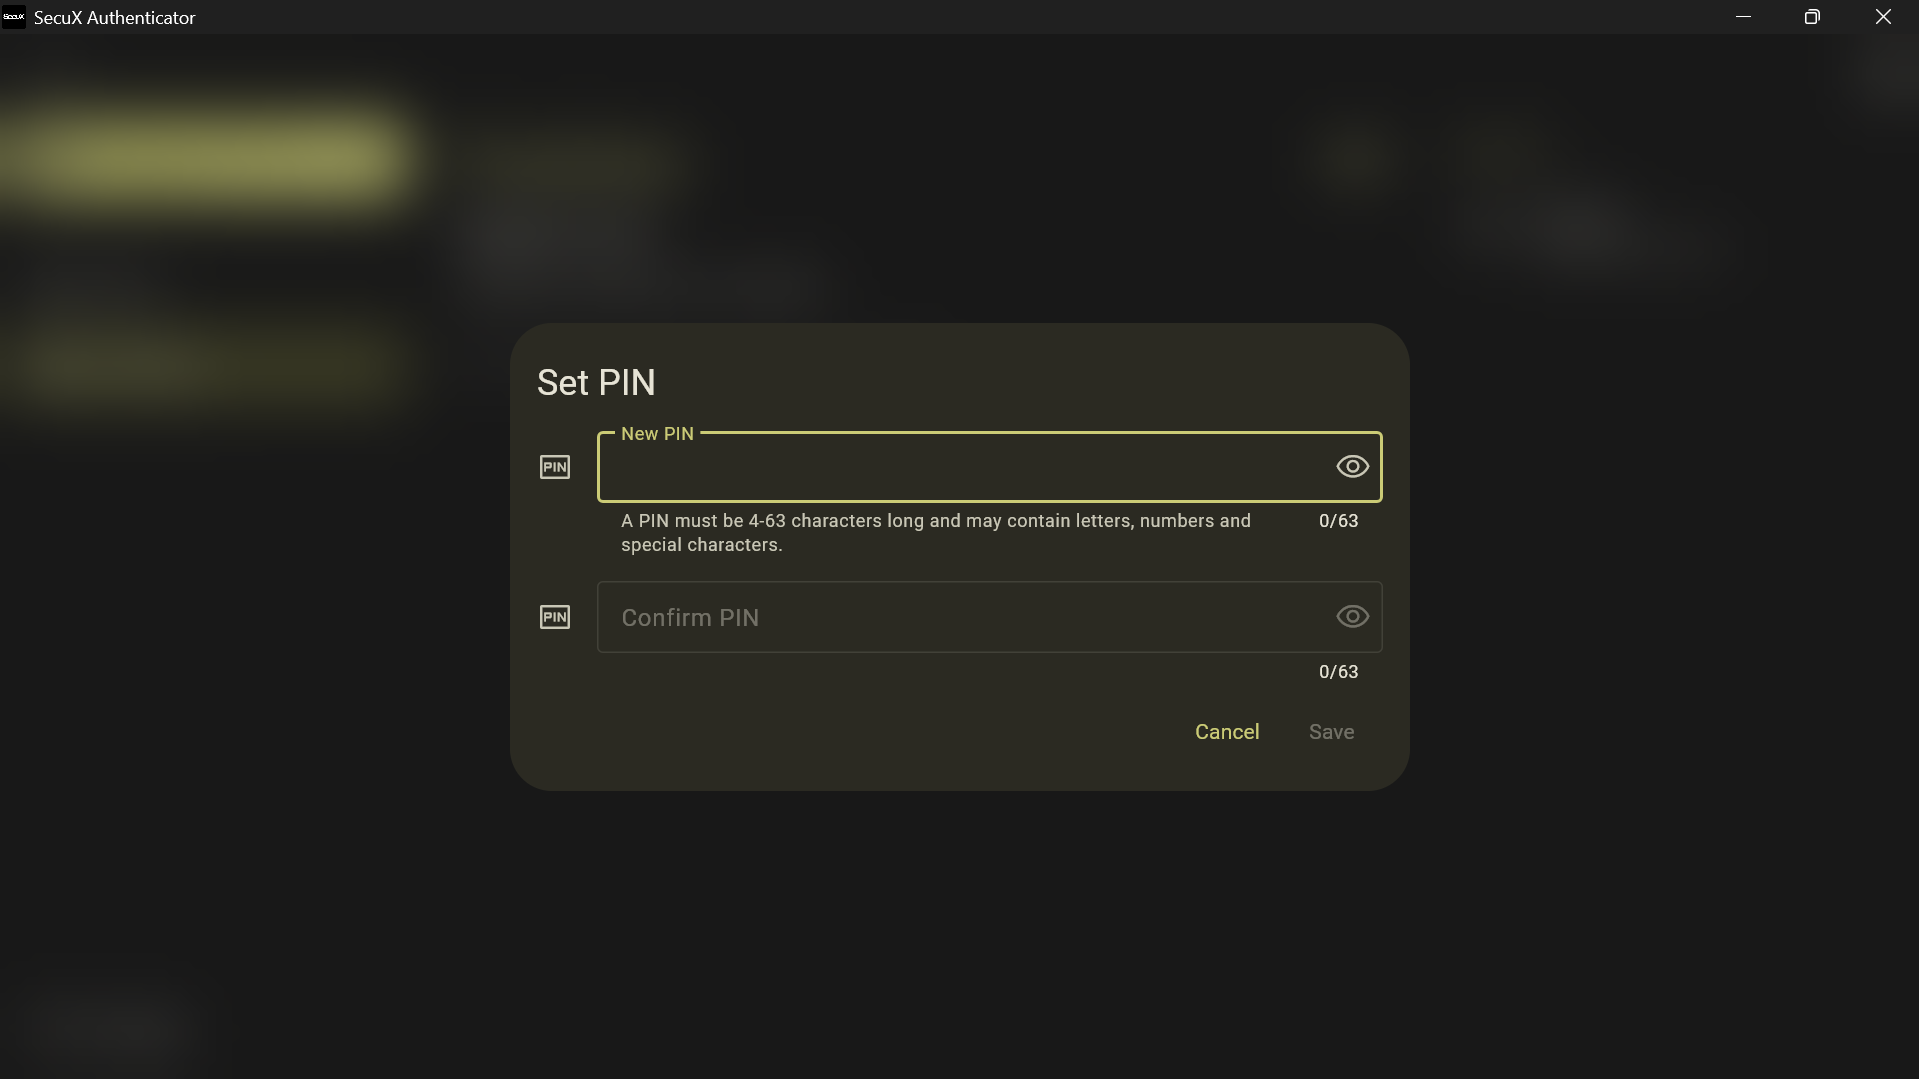
PIN requirements
The PIN must meet the device's security requirements, which may include:
- Minimum length
- Numeric or alphanumeric characters
Once the PIN is created, it will be required whenever sensitive operations are performed on the key.
⚠ Important
If the PIN is entered incorrectly too many times, the device may temporarily lock to protect against unauthorized access.
Access the Device Dashboard
After the PIN setup is complete, the application will display the device dashboard.
The dashboard provides an overview of your SecuX PUFido key and allows you to navigate between different management features.
From the sidebar menu, you can access:
- Passkeys
- Security settings
- Device configuration
- Factory reset options
- Application settings
This dashboard serves as the central control panel for managing the security key.
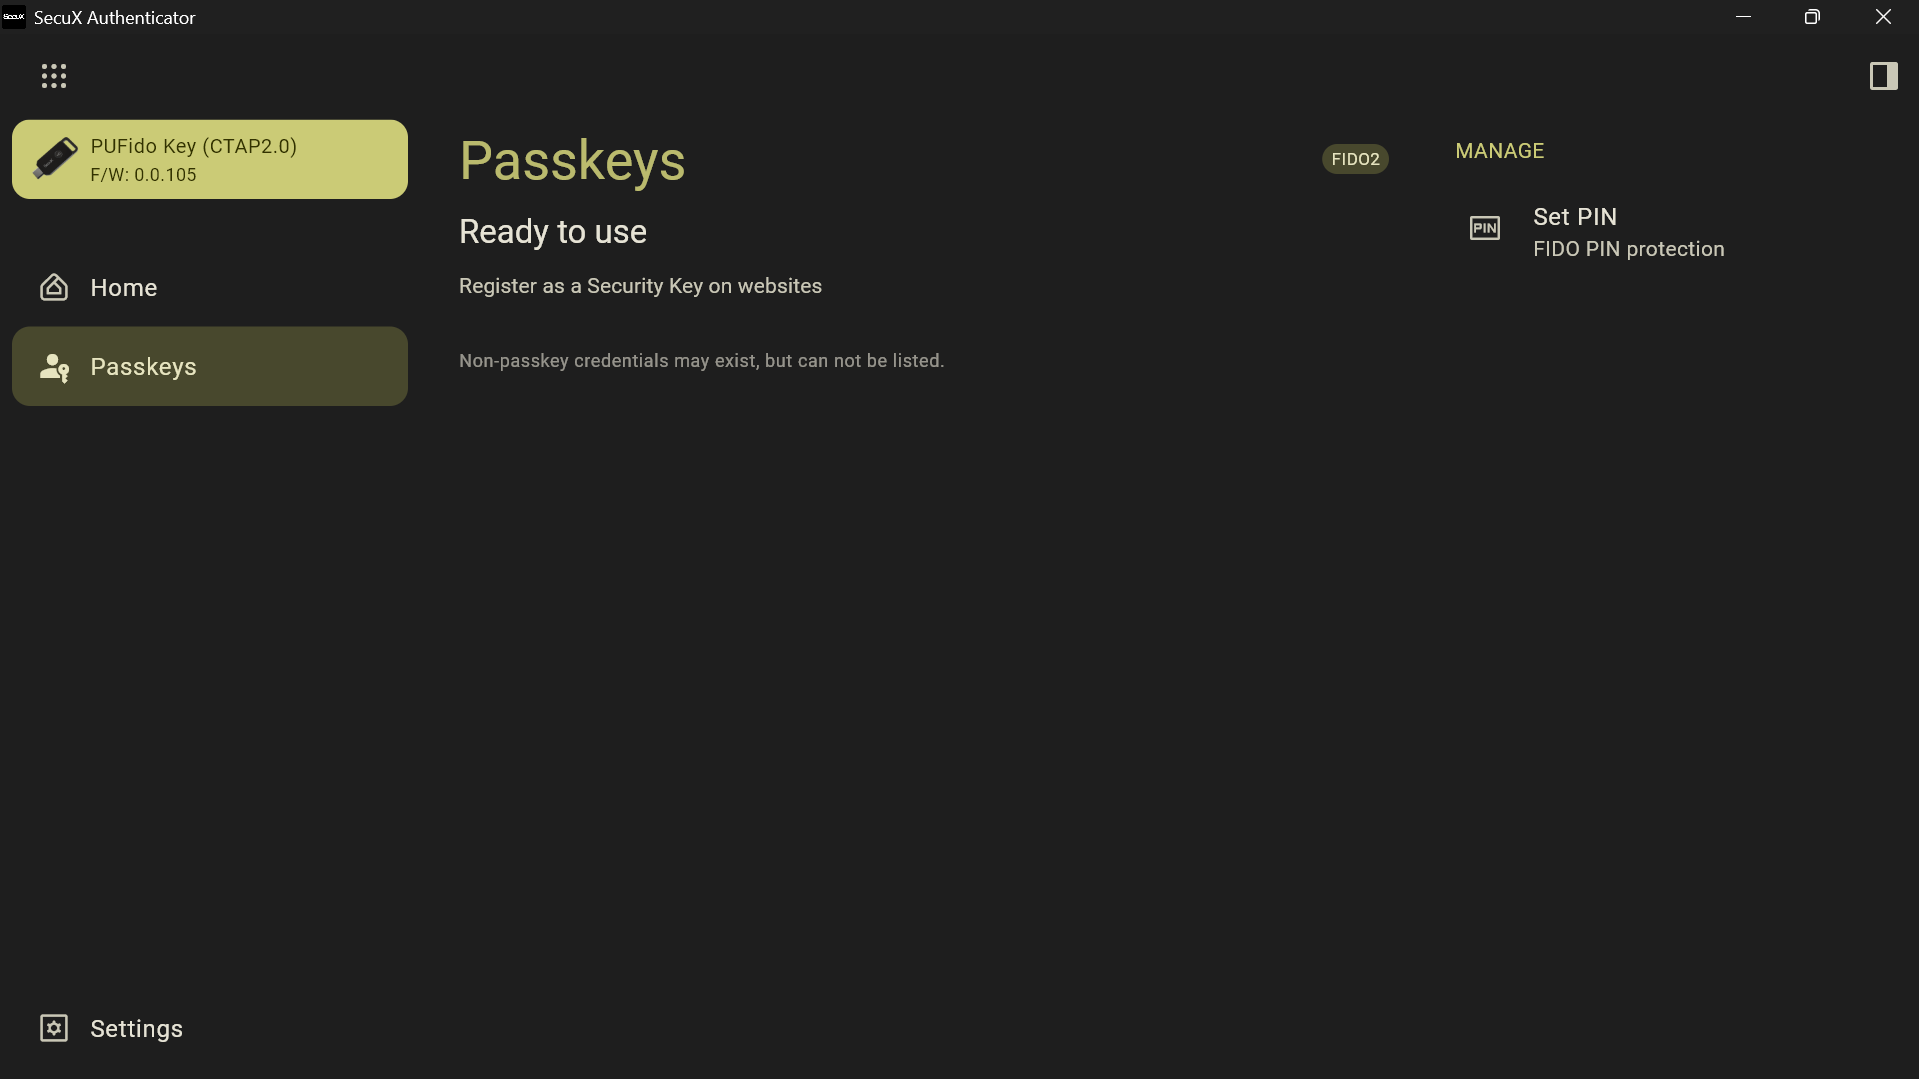
View and Manage Passkeys
Select Passkeys from the navigation panel to view credentials stored on your device.
Passkeys are FIDO2 credentials stored securely inside the hardware key, ensuring that private keys never leave the device.
In this section you can:
- View registered passkeys
- Identify the services associated with each credential
- Review the credentials stored on the device
Each passkey corresponds to an account registered with a website or service that supports FIDO2 authentication.
Because passkeys are hardware-protected, they cannot be extracted from the device, which protects them from malware and phishing attacks.
Verify PIN for Protected Actions
Some operations require PIN verification to confirm that the authorized user is performing the action.
When prompted:
- Enter your device PIN.
- Click Confirm.
Once the PIN is verified, the application will allow the requested operation to proceed.
Examples of actions that may require PIN verification include:
- Viewing protected credential information
- Changing the PIN
- Resetting security settings
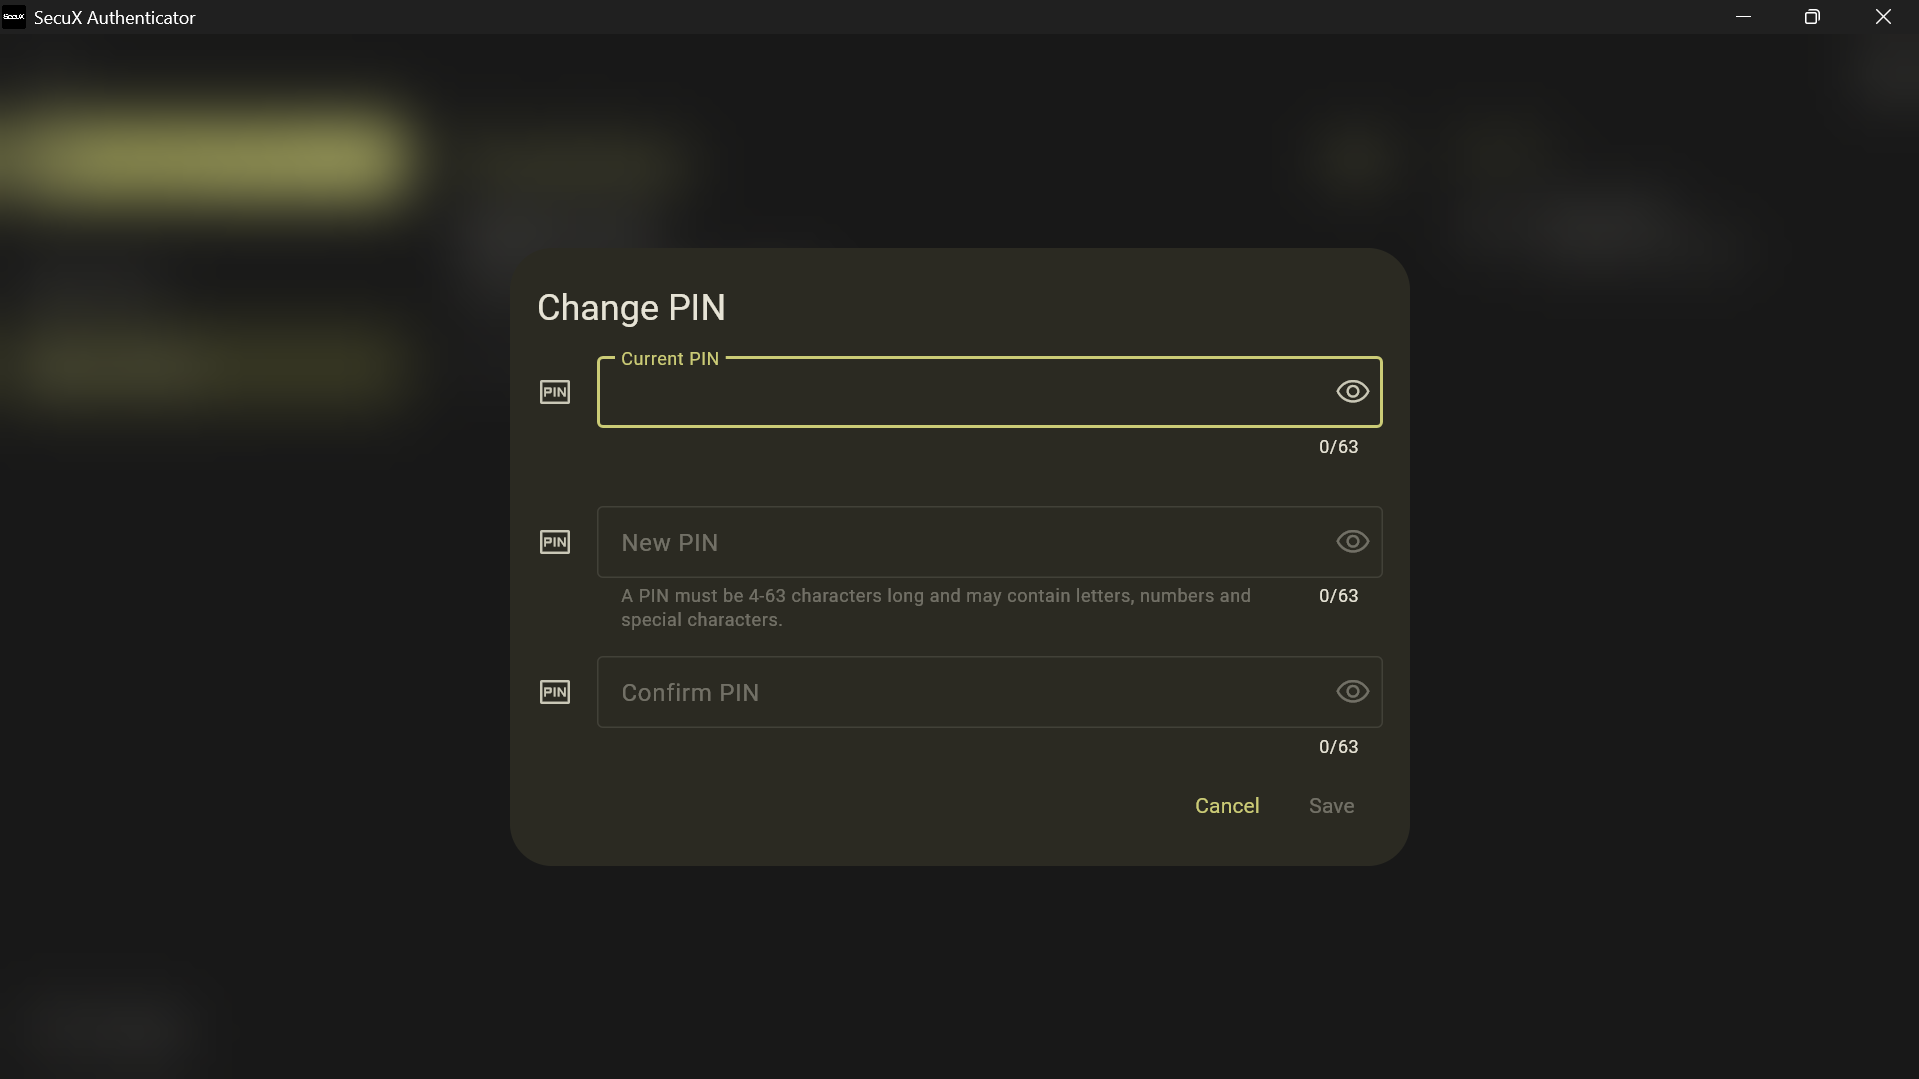
Change the Device PIN
If you need to update your device PIN, you can do so from the PIN management section.
Steps to change the PIN
- Navigate to the Change PIN option.
- Enter your current PIN.
- Enter a new PIN.
- Confirm the new PIN.
- Click Confirm to apply the change.
Once completed, the new PIN will replace the previous one.
For security reasons, choose a PIN that is unique and difficult to guess.

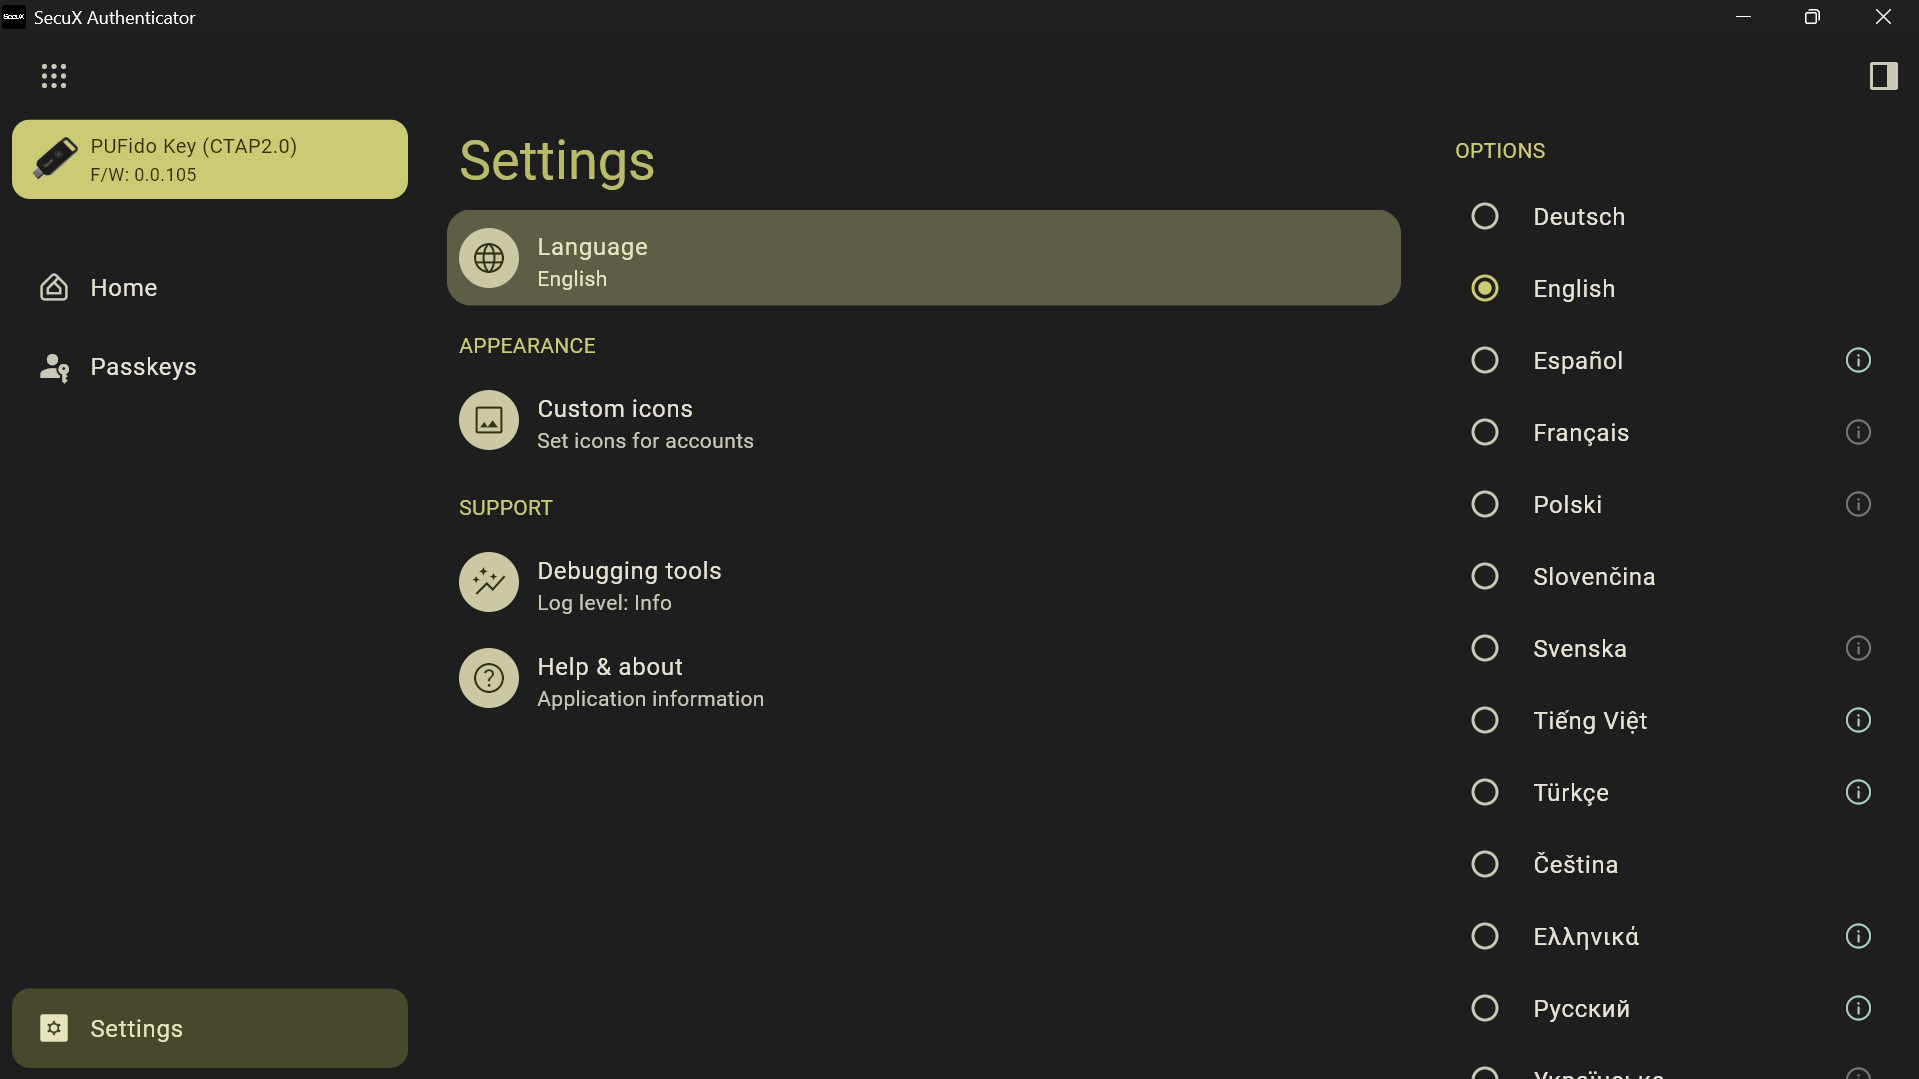
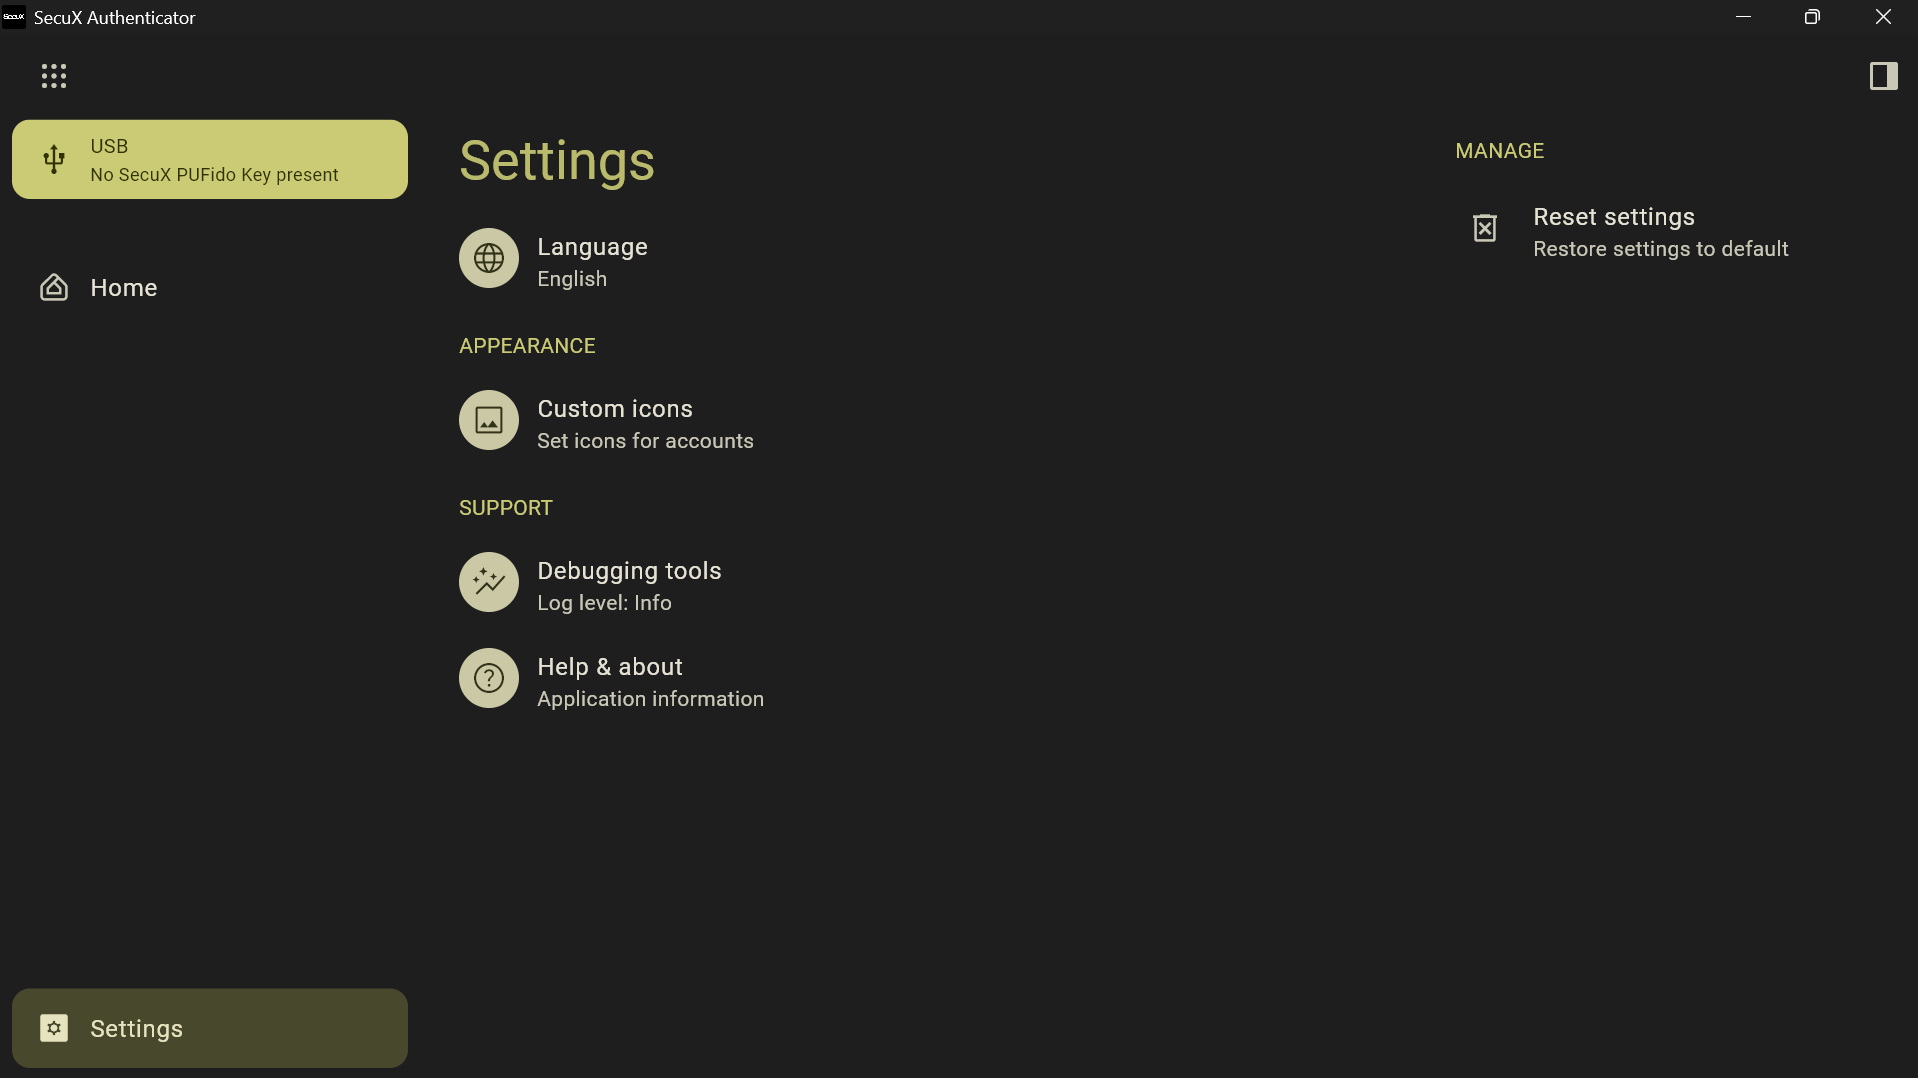
Configure Application Settings
Open the Settings section from the navigation menu to configure the SecuX Authenticator application.
Available configuration options include:
Language
Change the language used by the application interface.
Custom Icons
Customize icons used to represent credentials or services stored on the device.
This can make it easier to quickly identify different accounts.
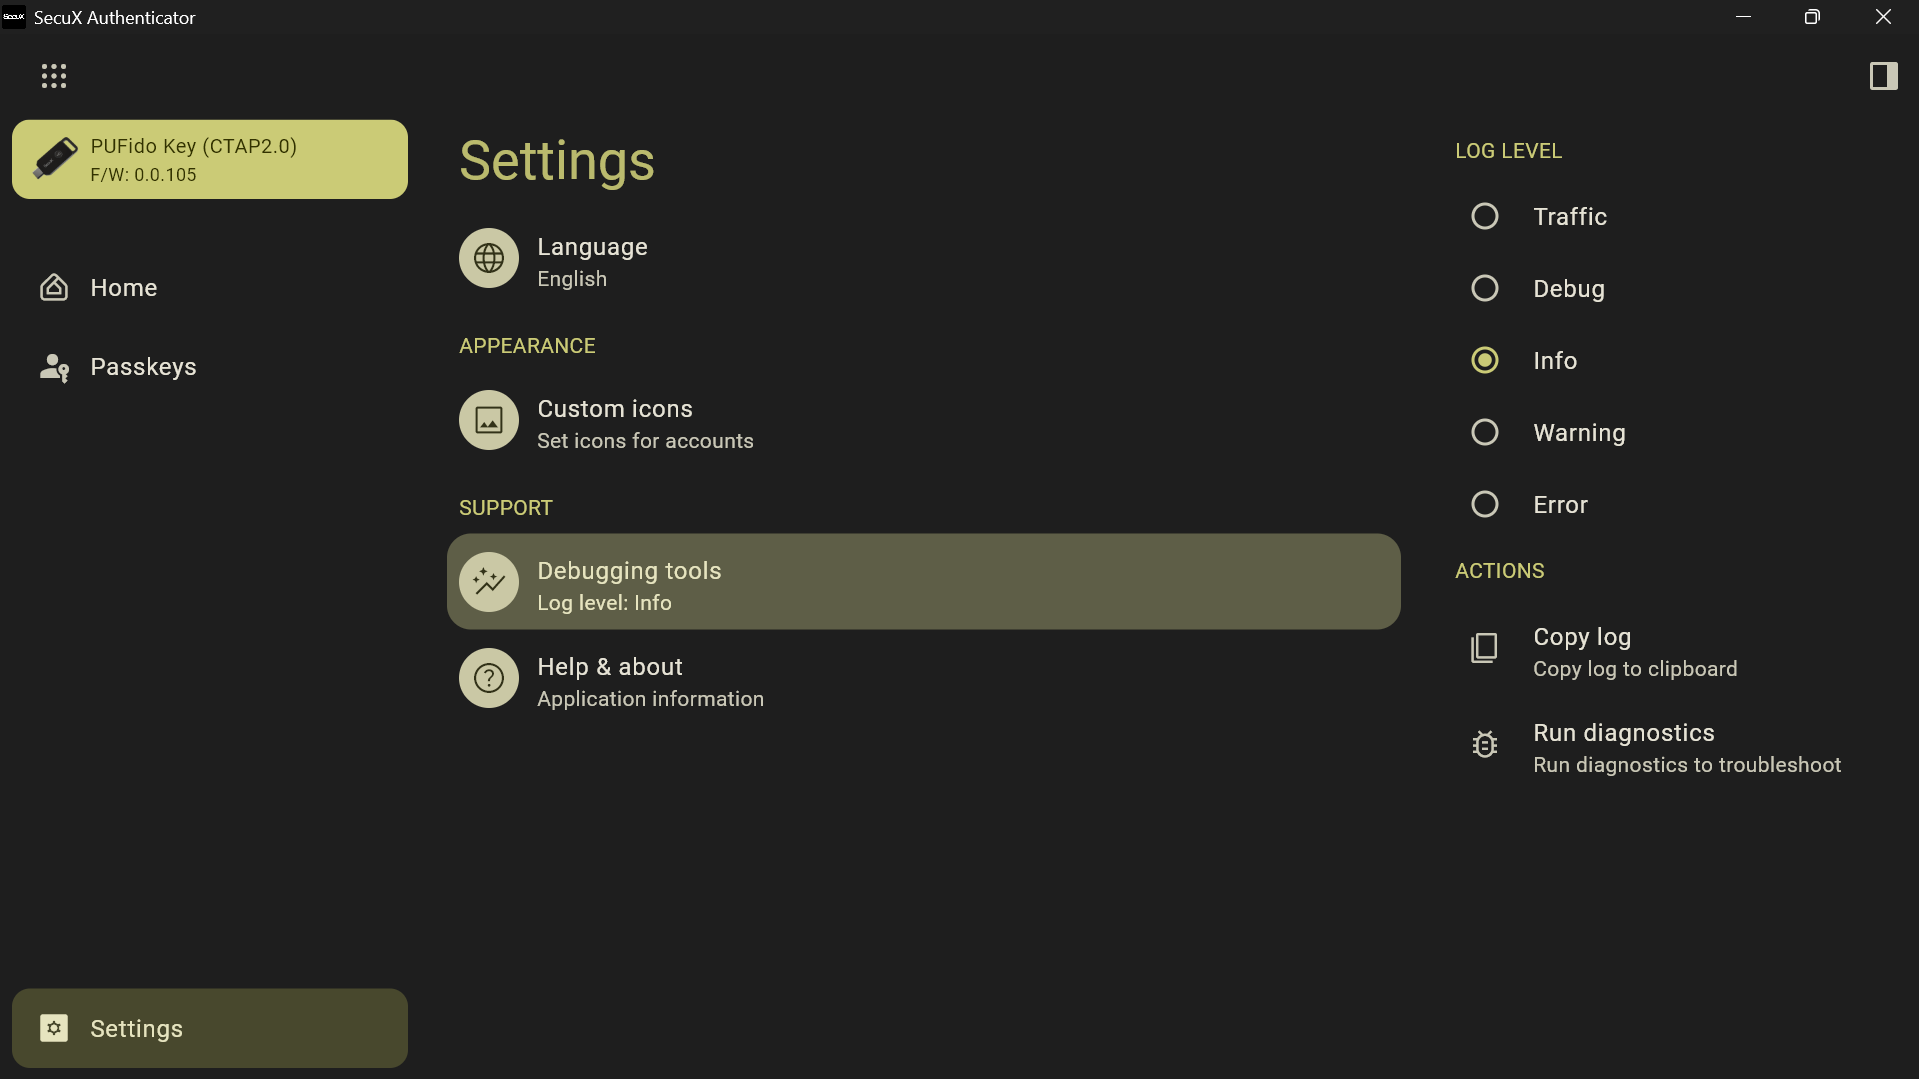
Debugging Tools
Enable debugging logs for troubleshooting or when requested by the support team.
Debug logs help diagnose connection or authentication issues.
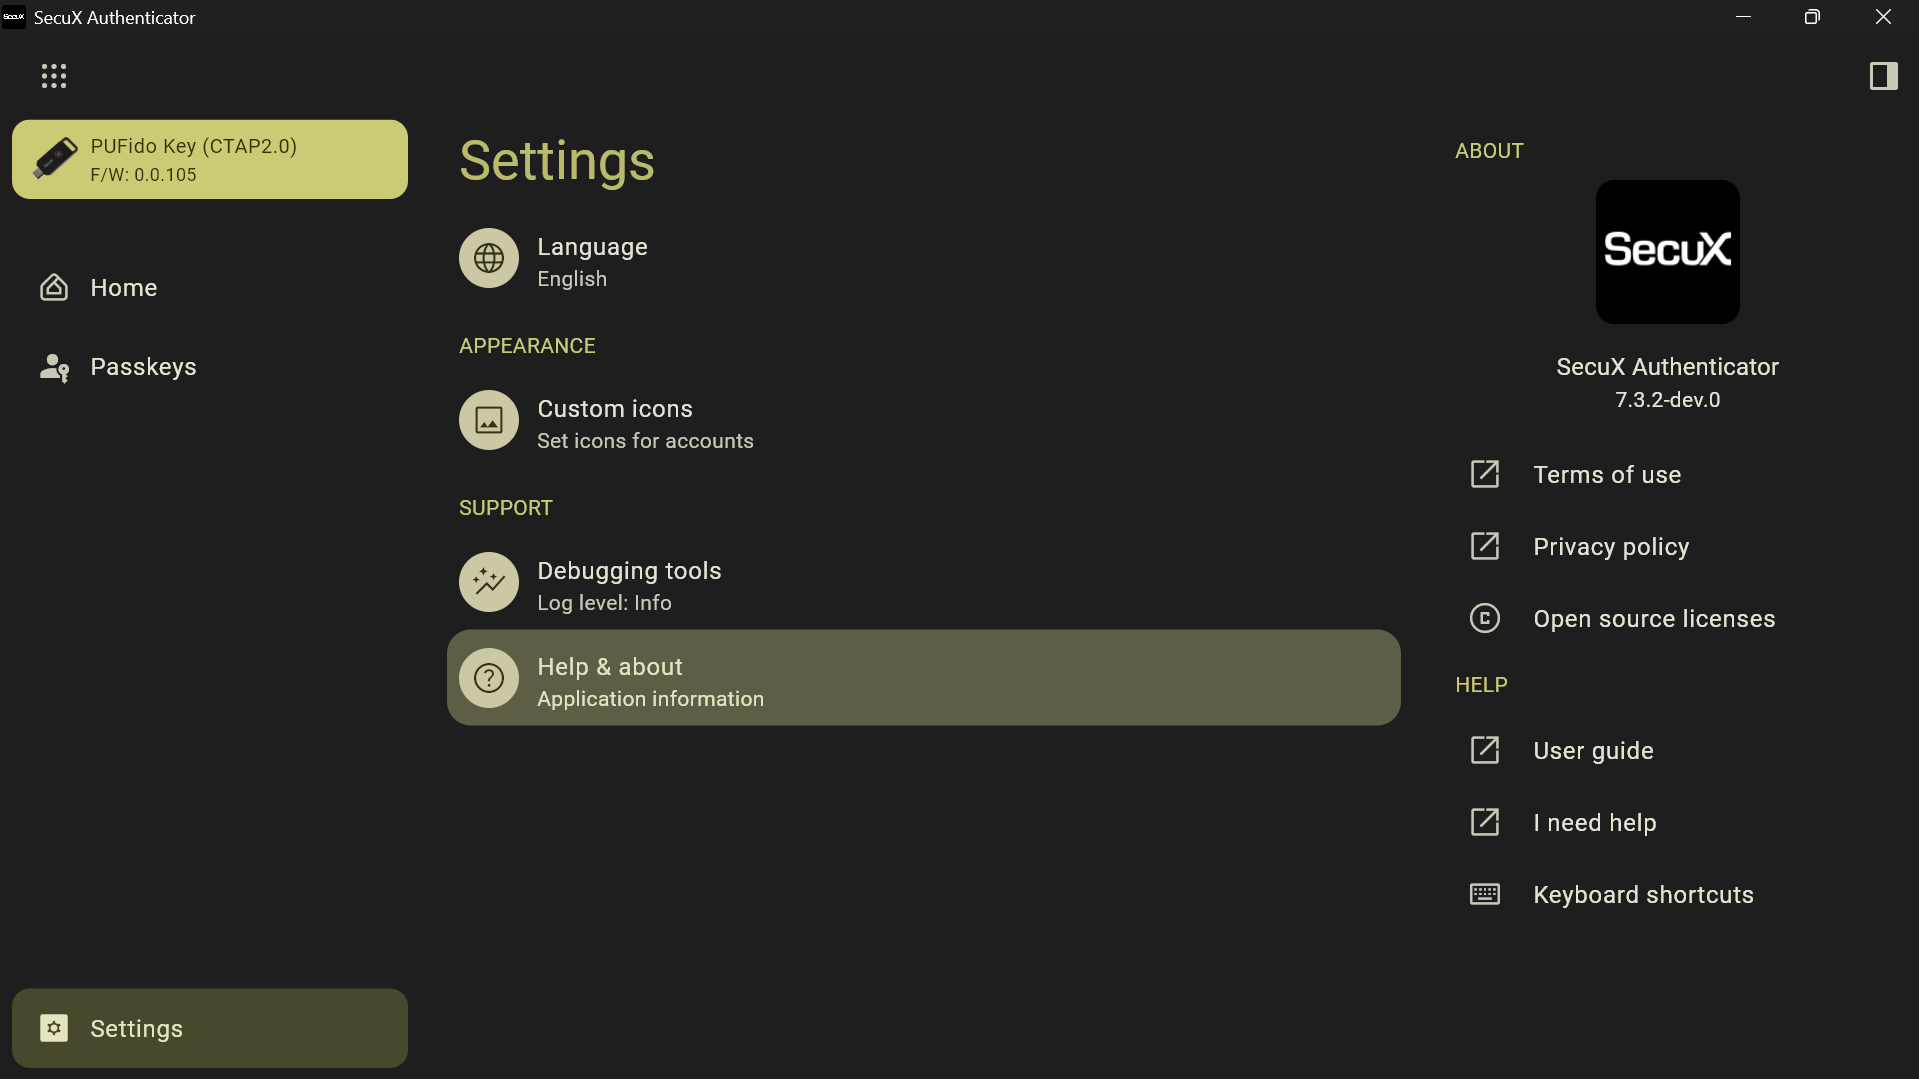
Help and Information
Access information about the application, including:
- Version details
- Documentation
- Support resources
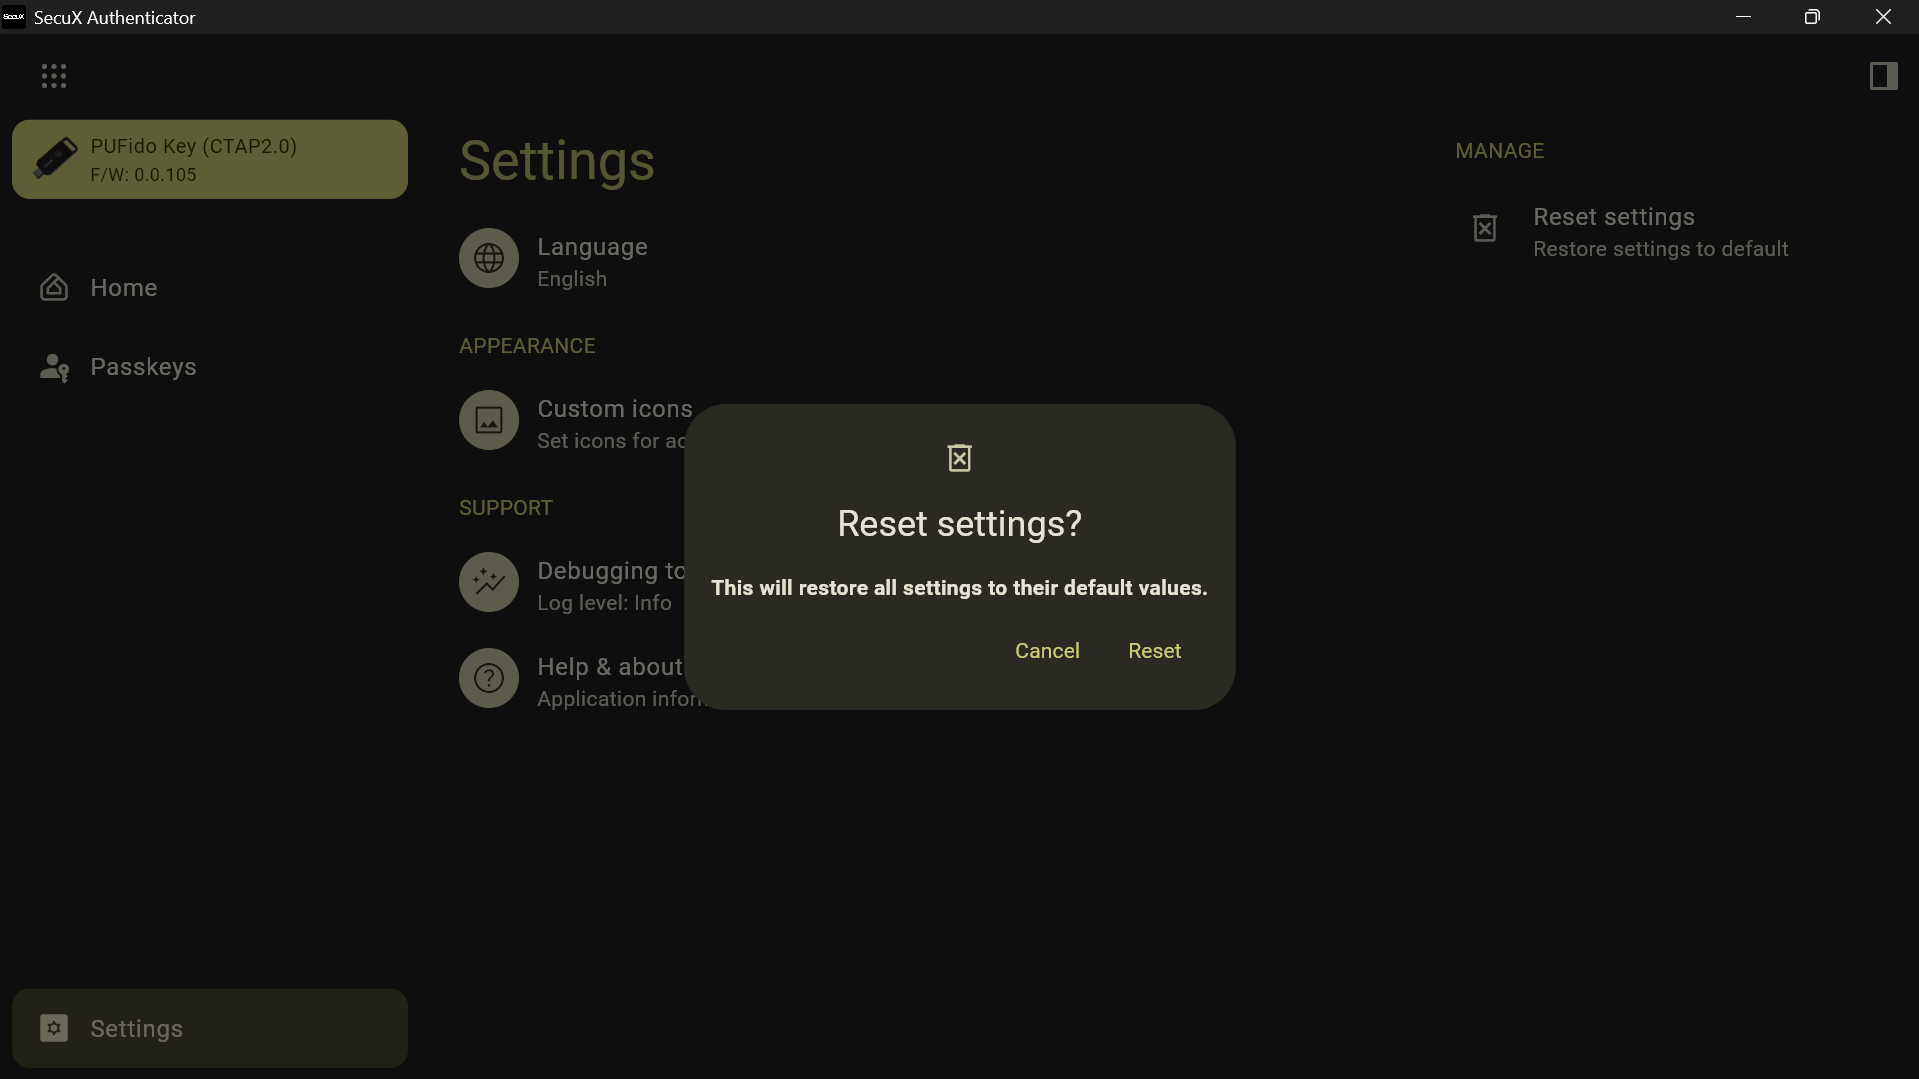
Reset Application Settings (Optional)
If necessary, you can restore the application configuration to its default state.
Resetting application settings will:
- Restore all software preferences to their default values
- Remove customized interface settings
Important:
This operation does not delete credentials stored on the hardware key.
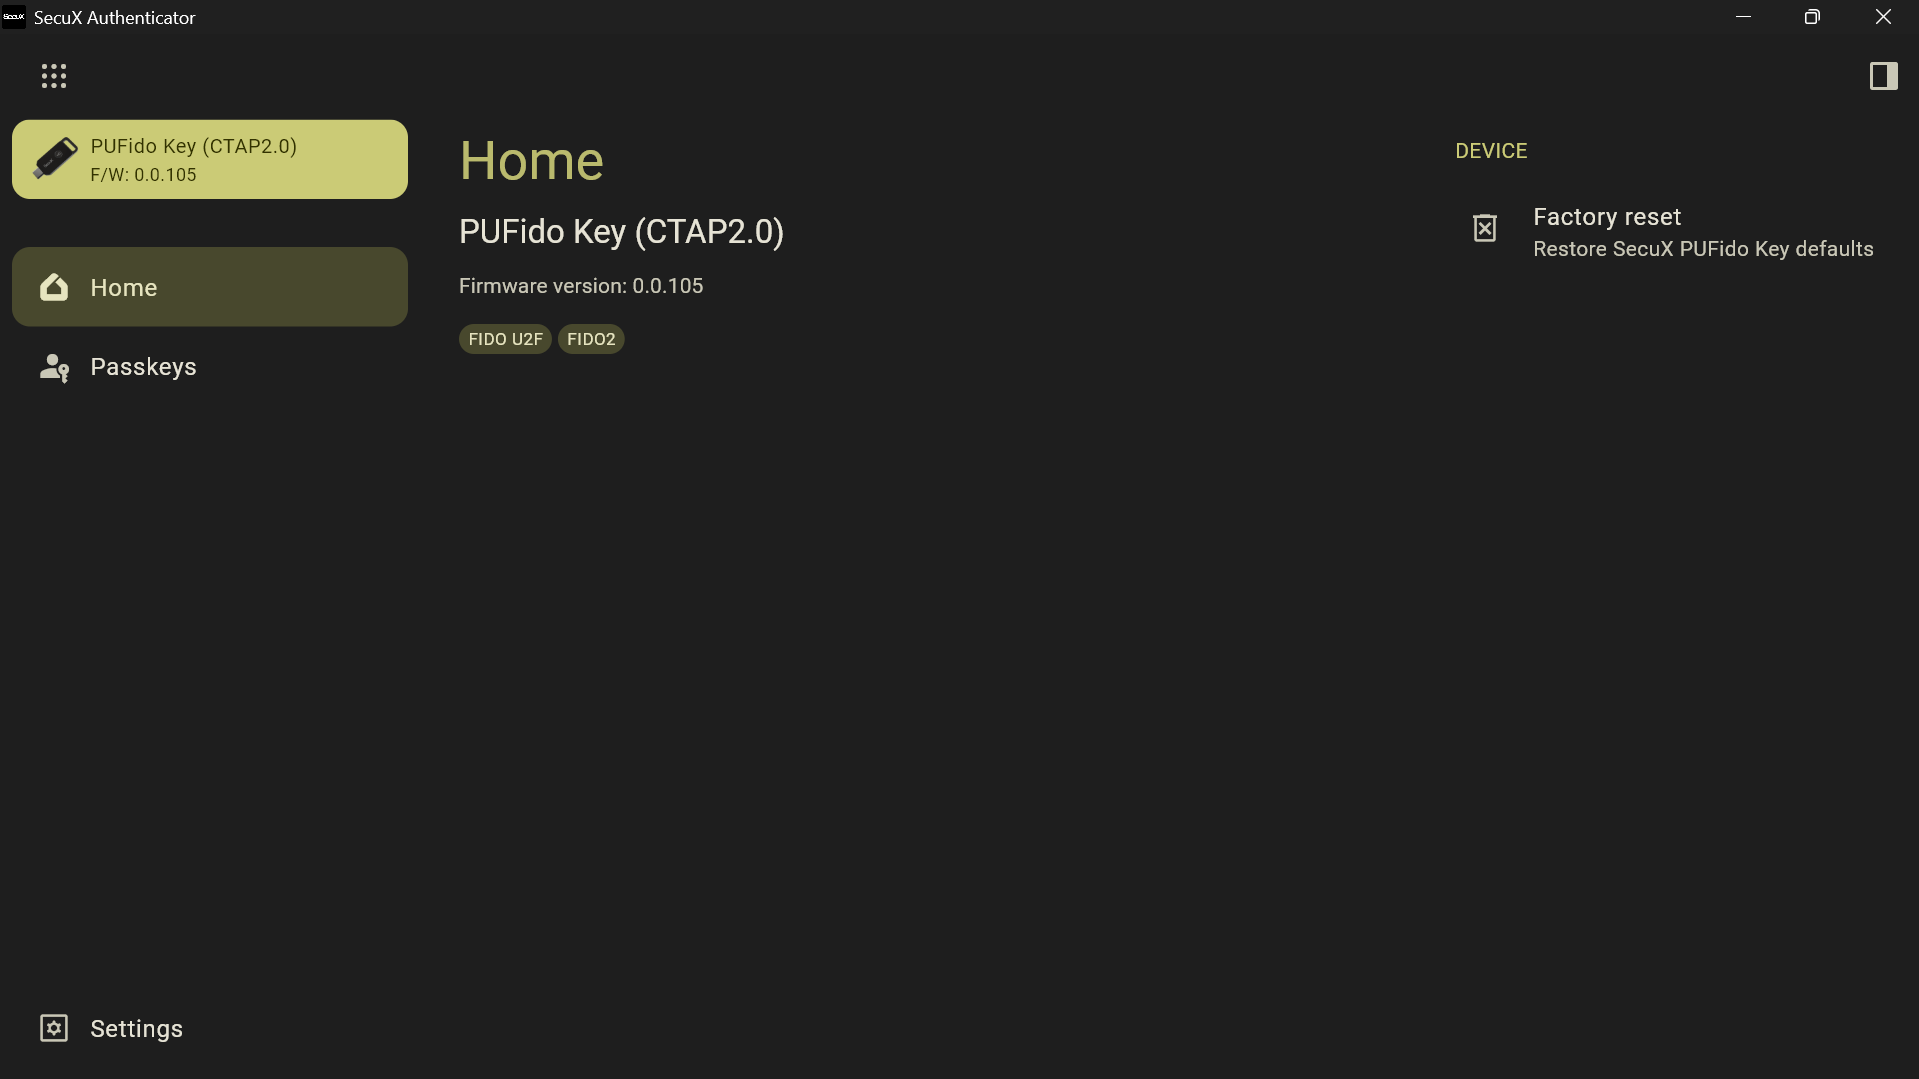
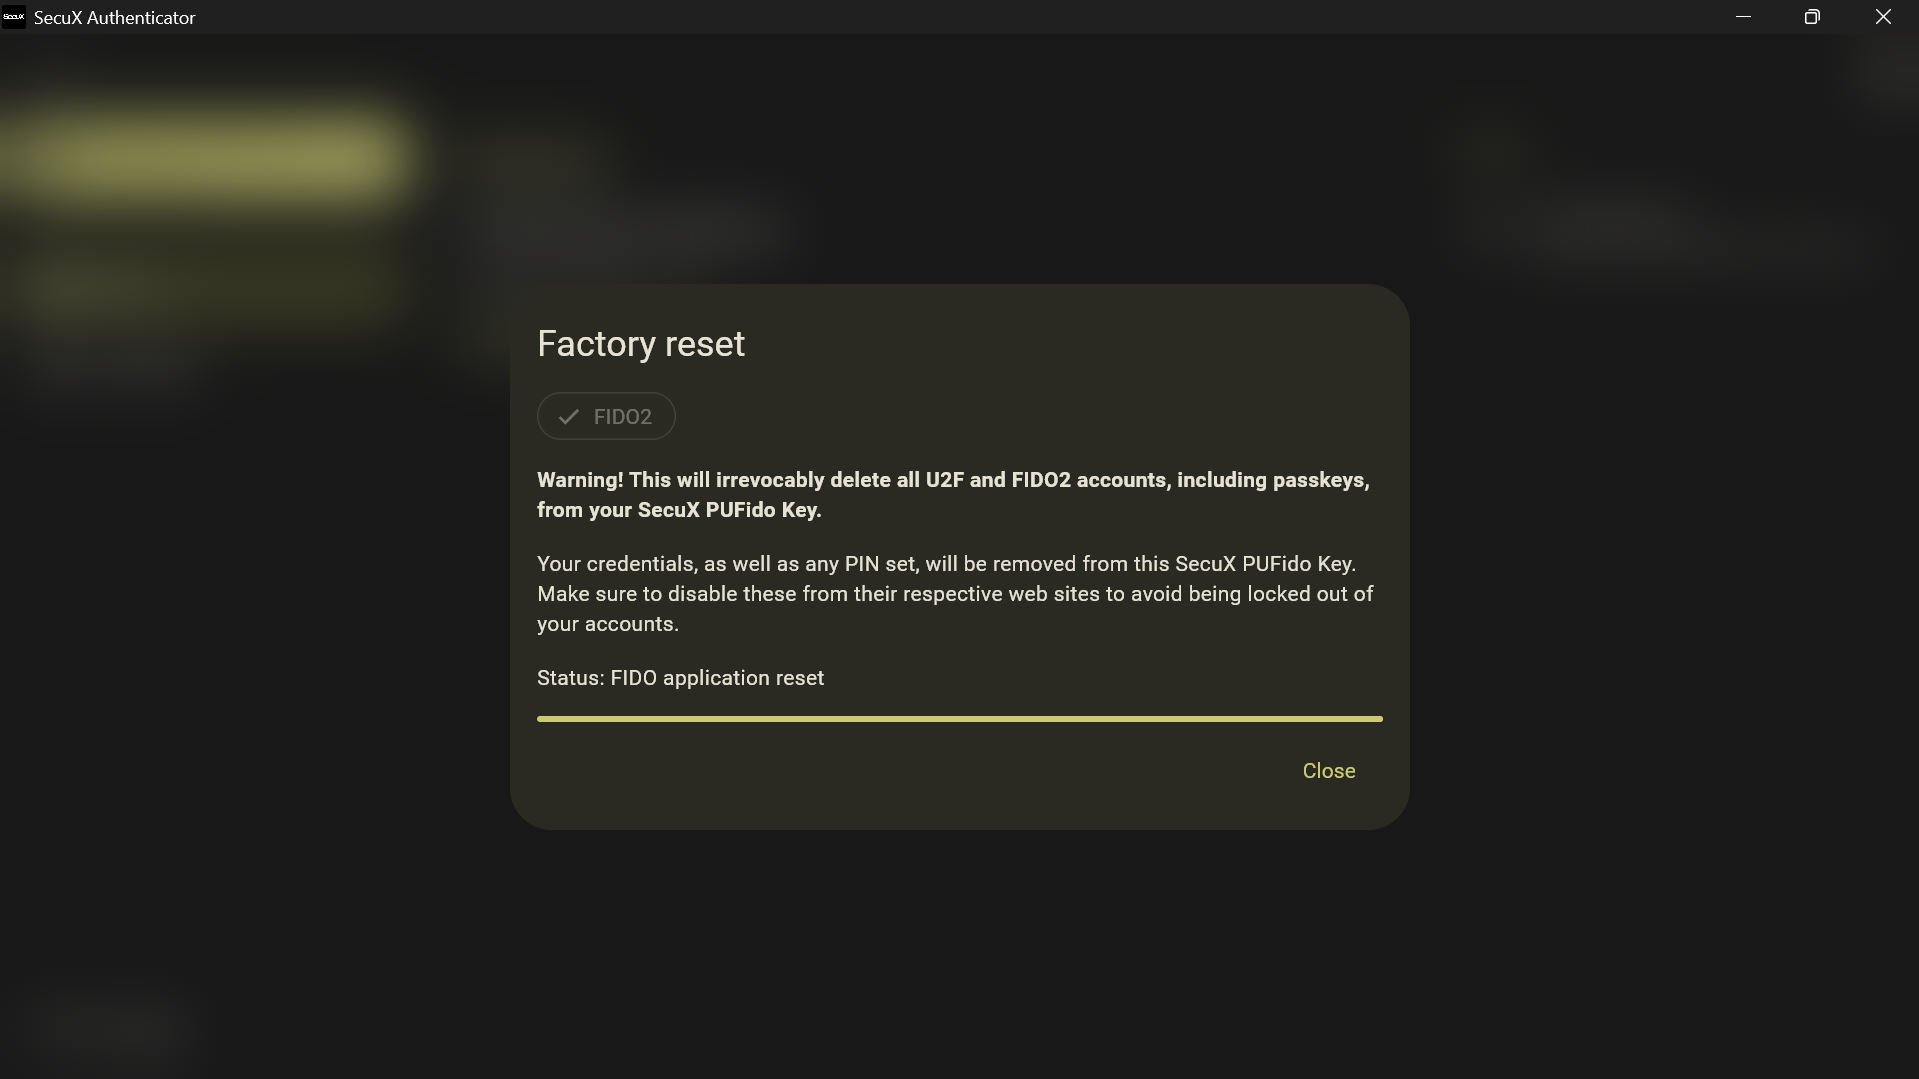
Perform a Factory Reset of the Security Key
For advanced maintenance, SecuX Authenticator allows performing a factory reset of the PUFido key.
A factory reset will permanently erase all stored authentication data.
This includes:
- FIDO2 passkeys
- U2F registrations
- Stored accounts
- The device PIN
After the reset, the key will return to its original factory configuration.
⚠ Important
This action cannot be undone.
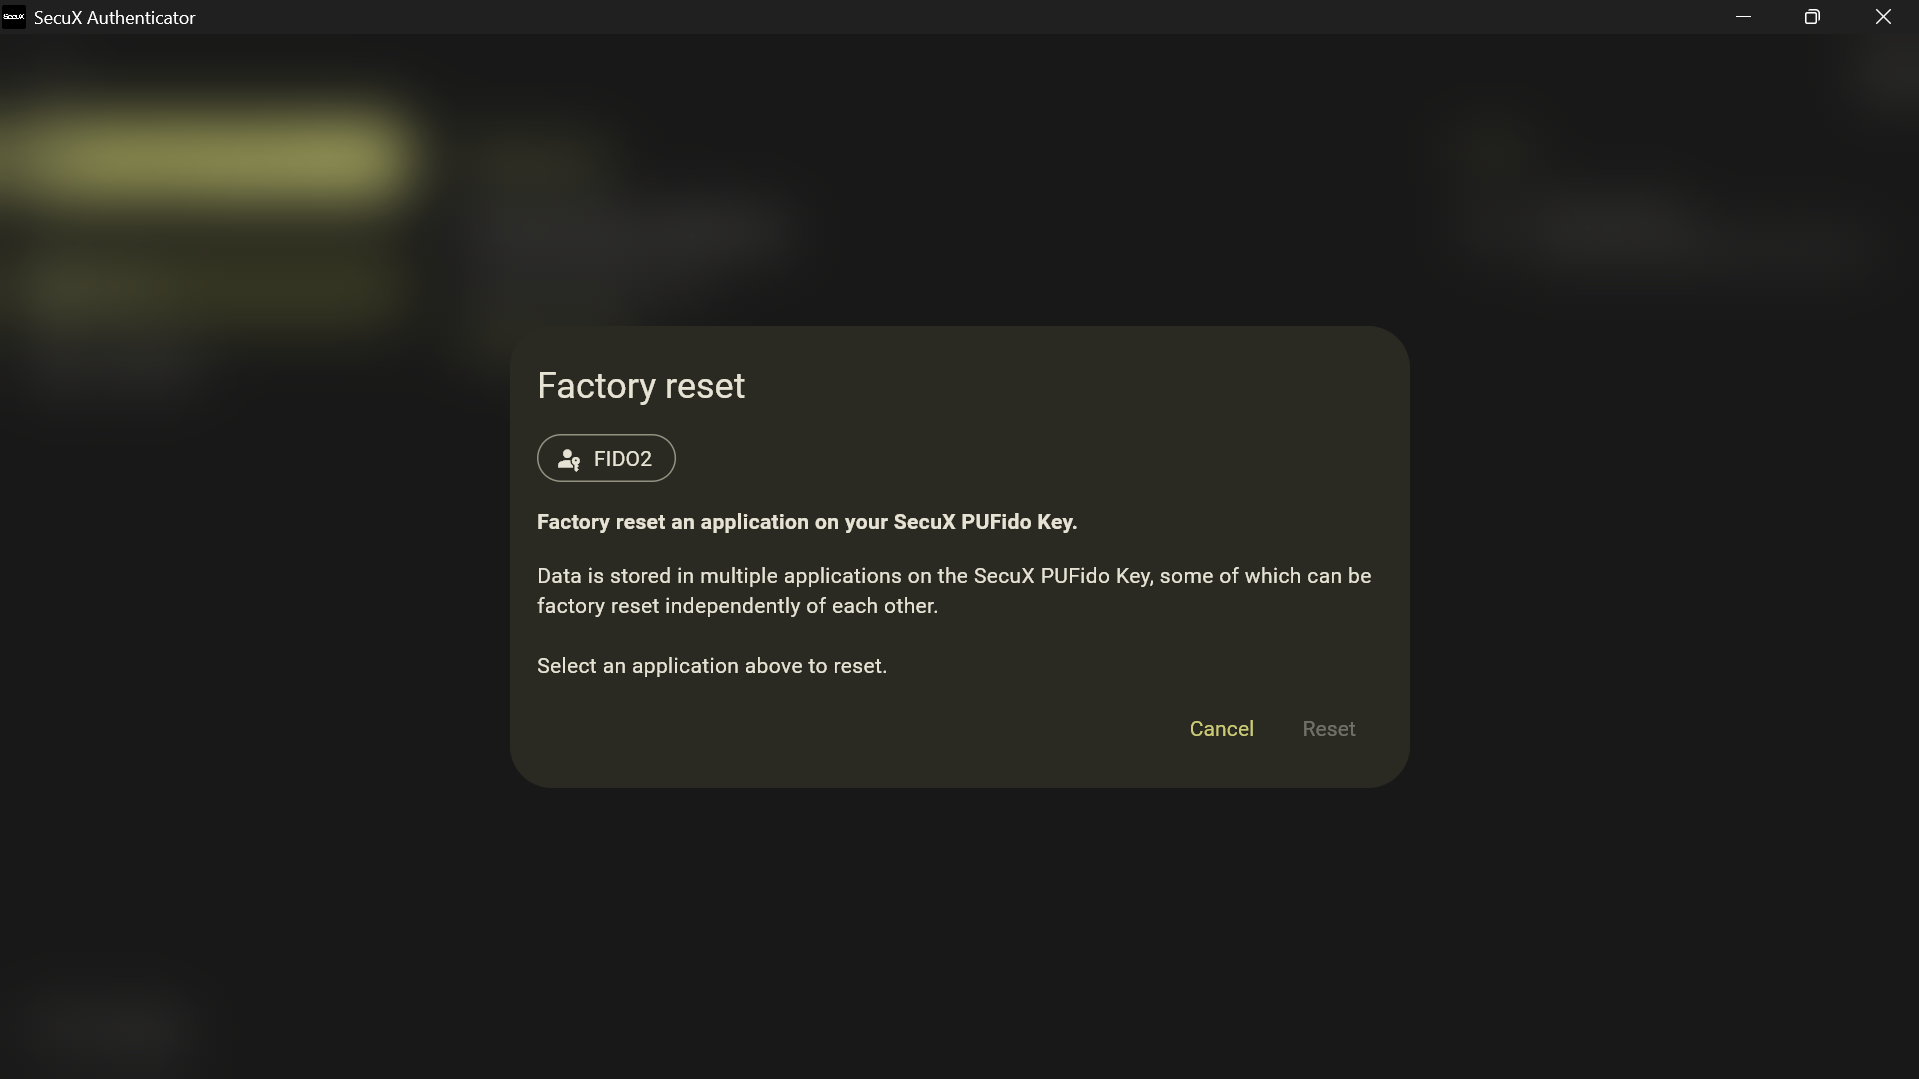
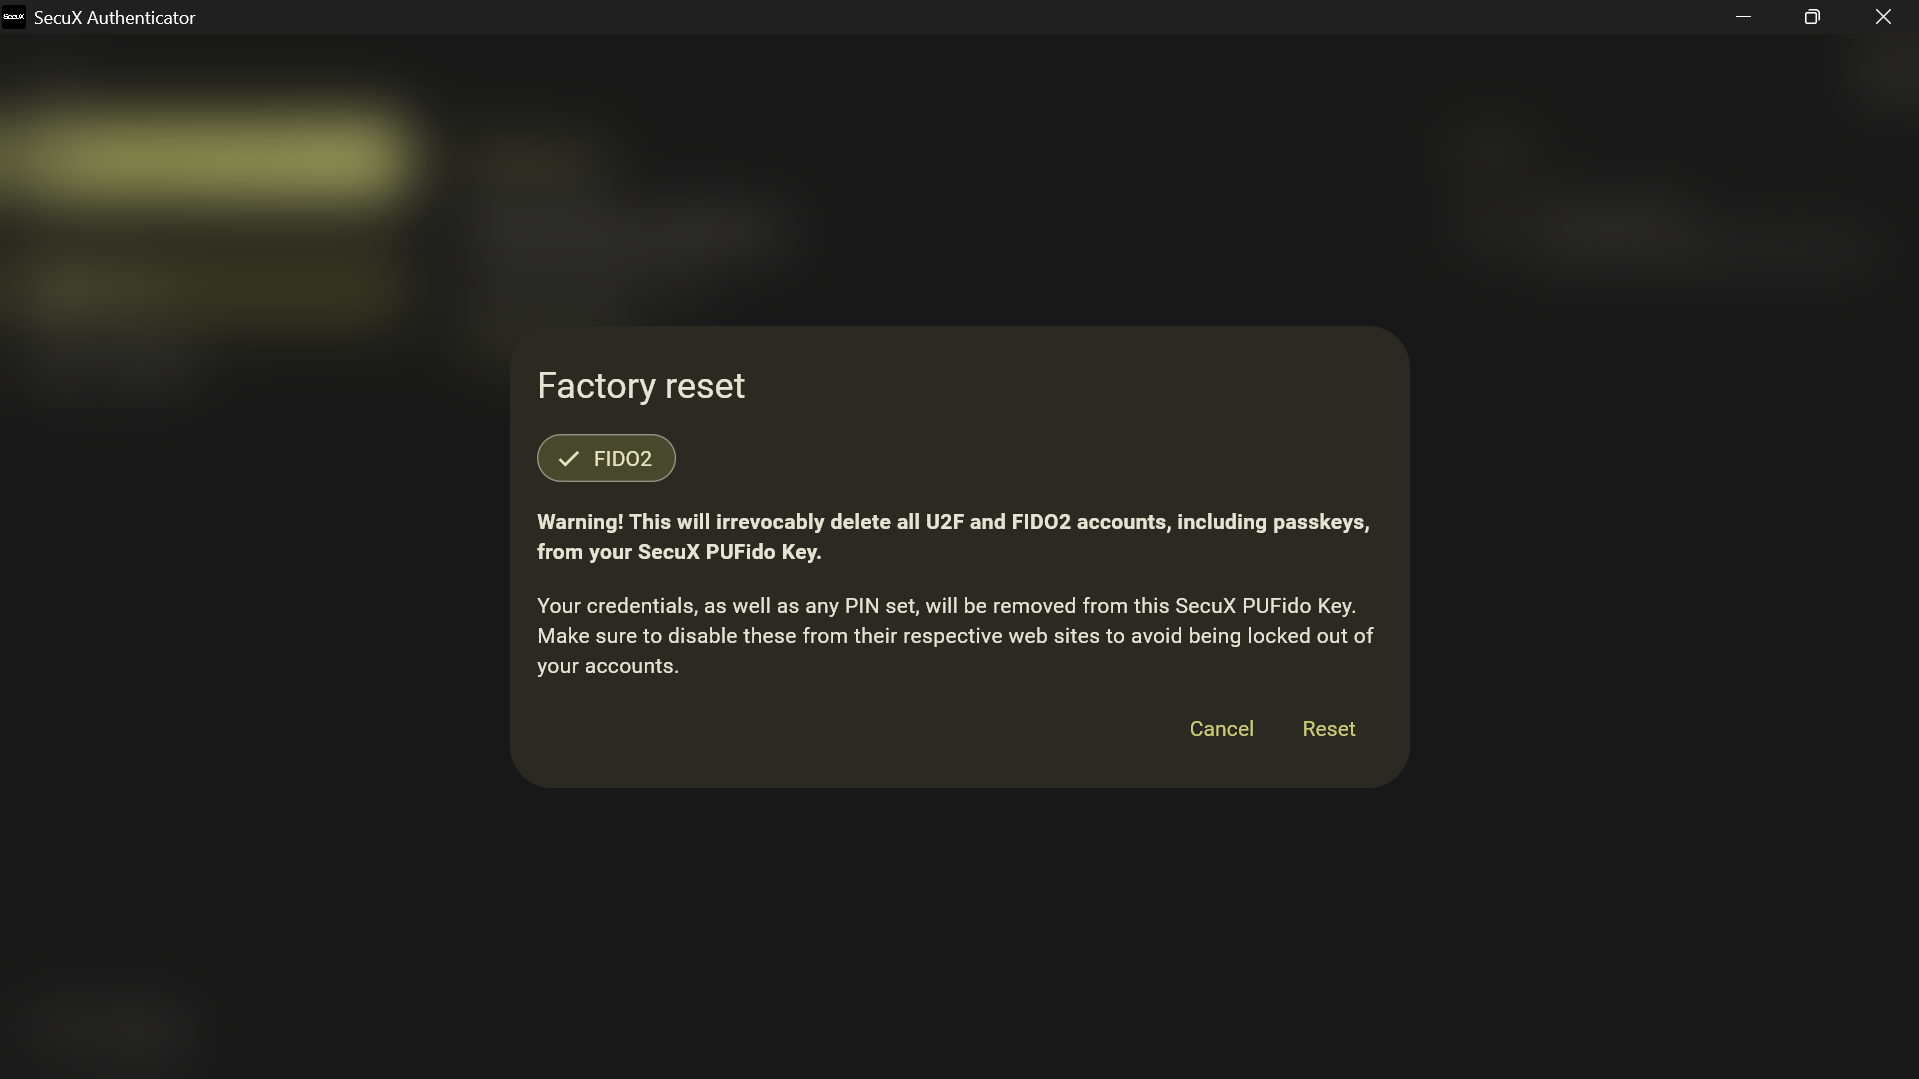
Confirm the Factory Reset Process
To perform the reset:
- Select Factory Reset within the application.
- Choose the FIDO2 application reset option.
- Confirm the warning message.
- Follow the instructions displayed on screen.
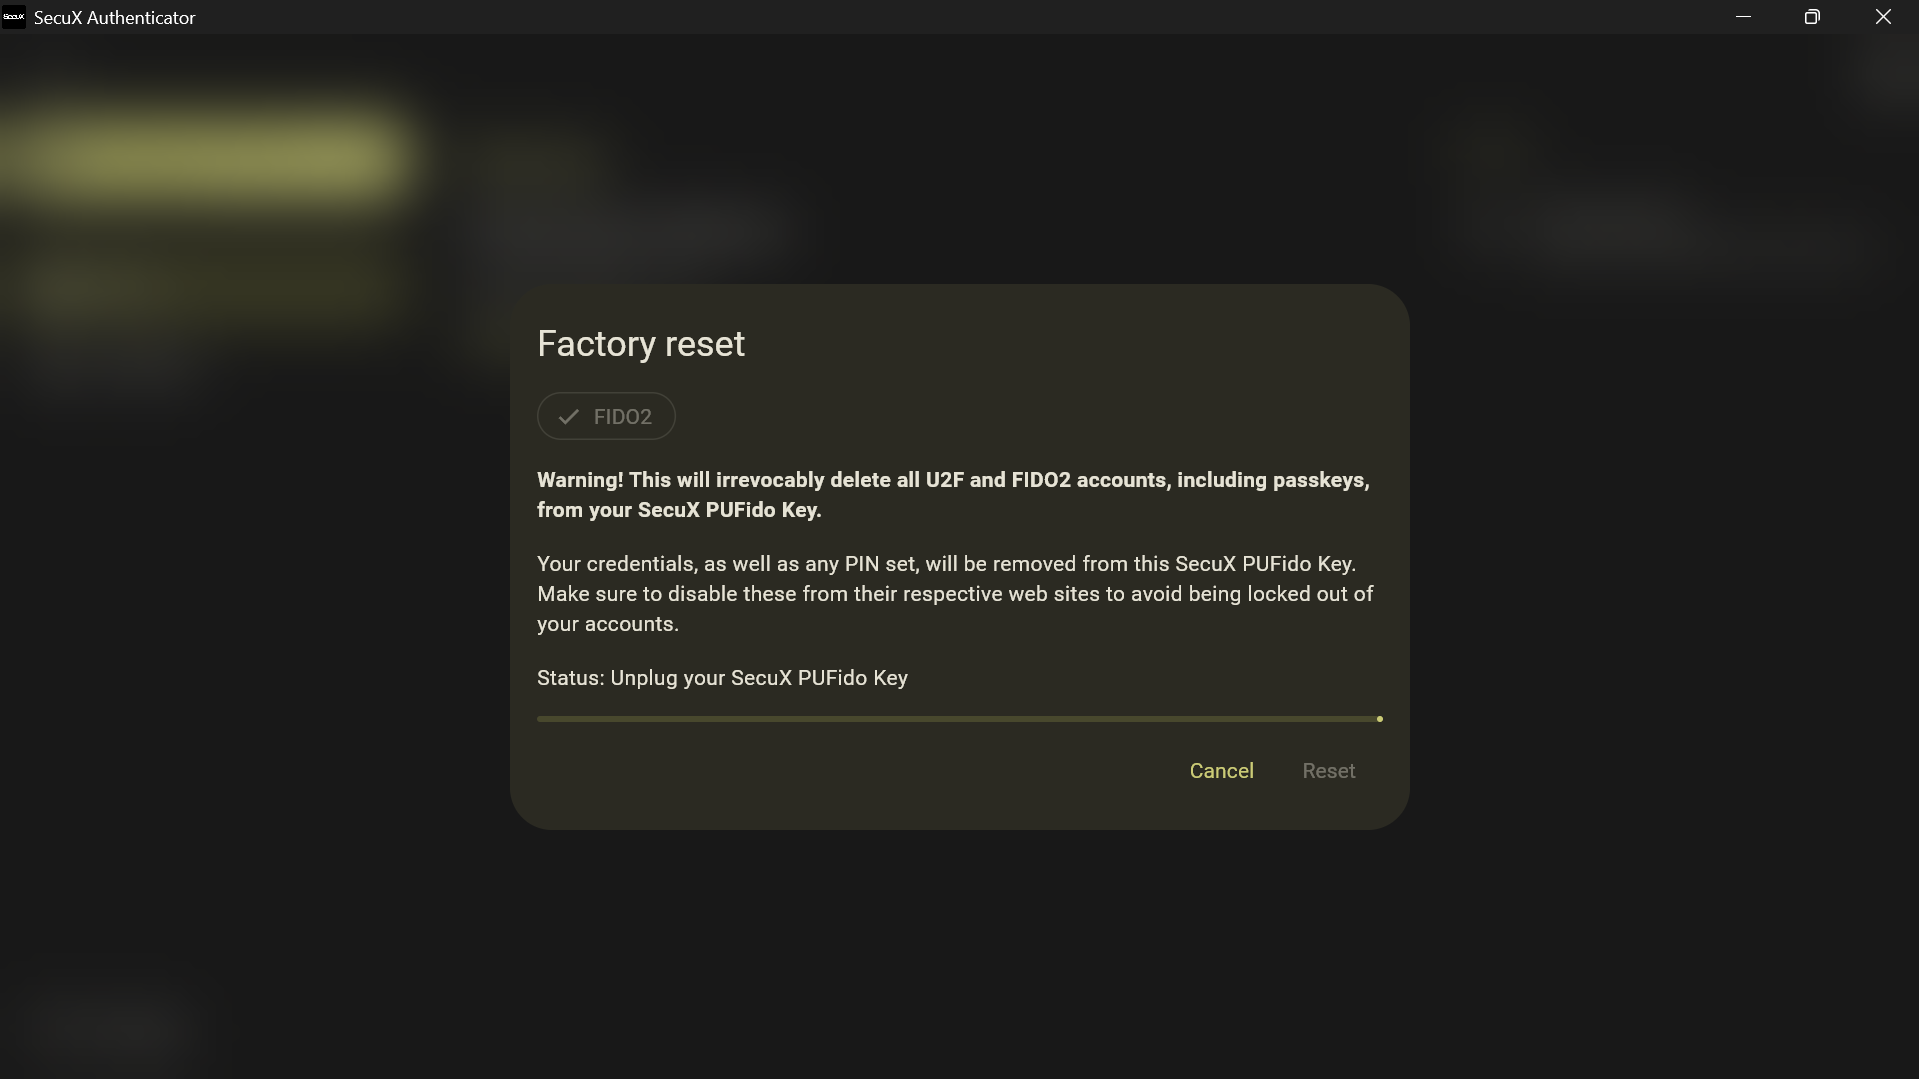
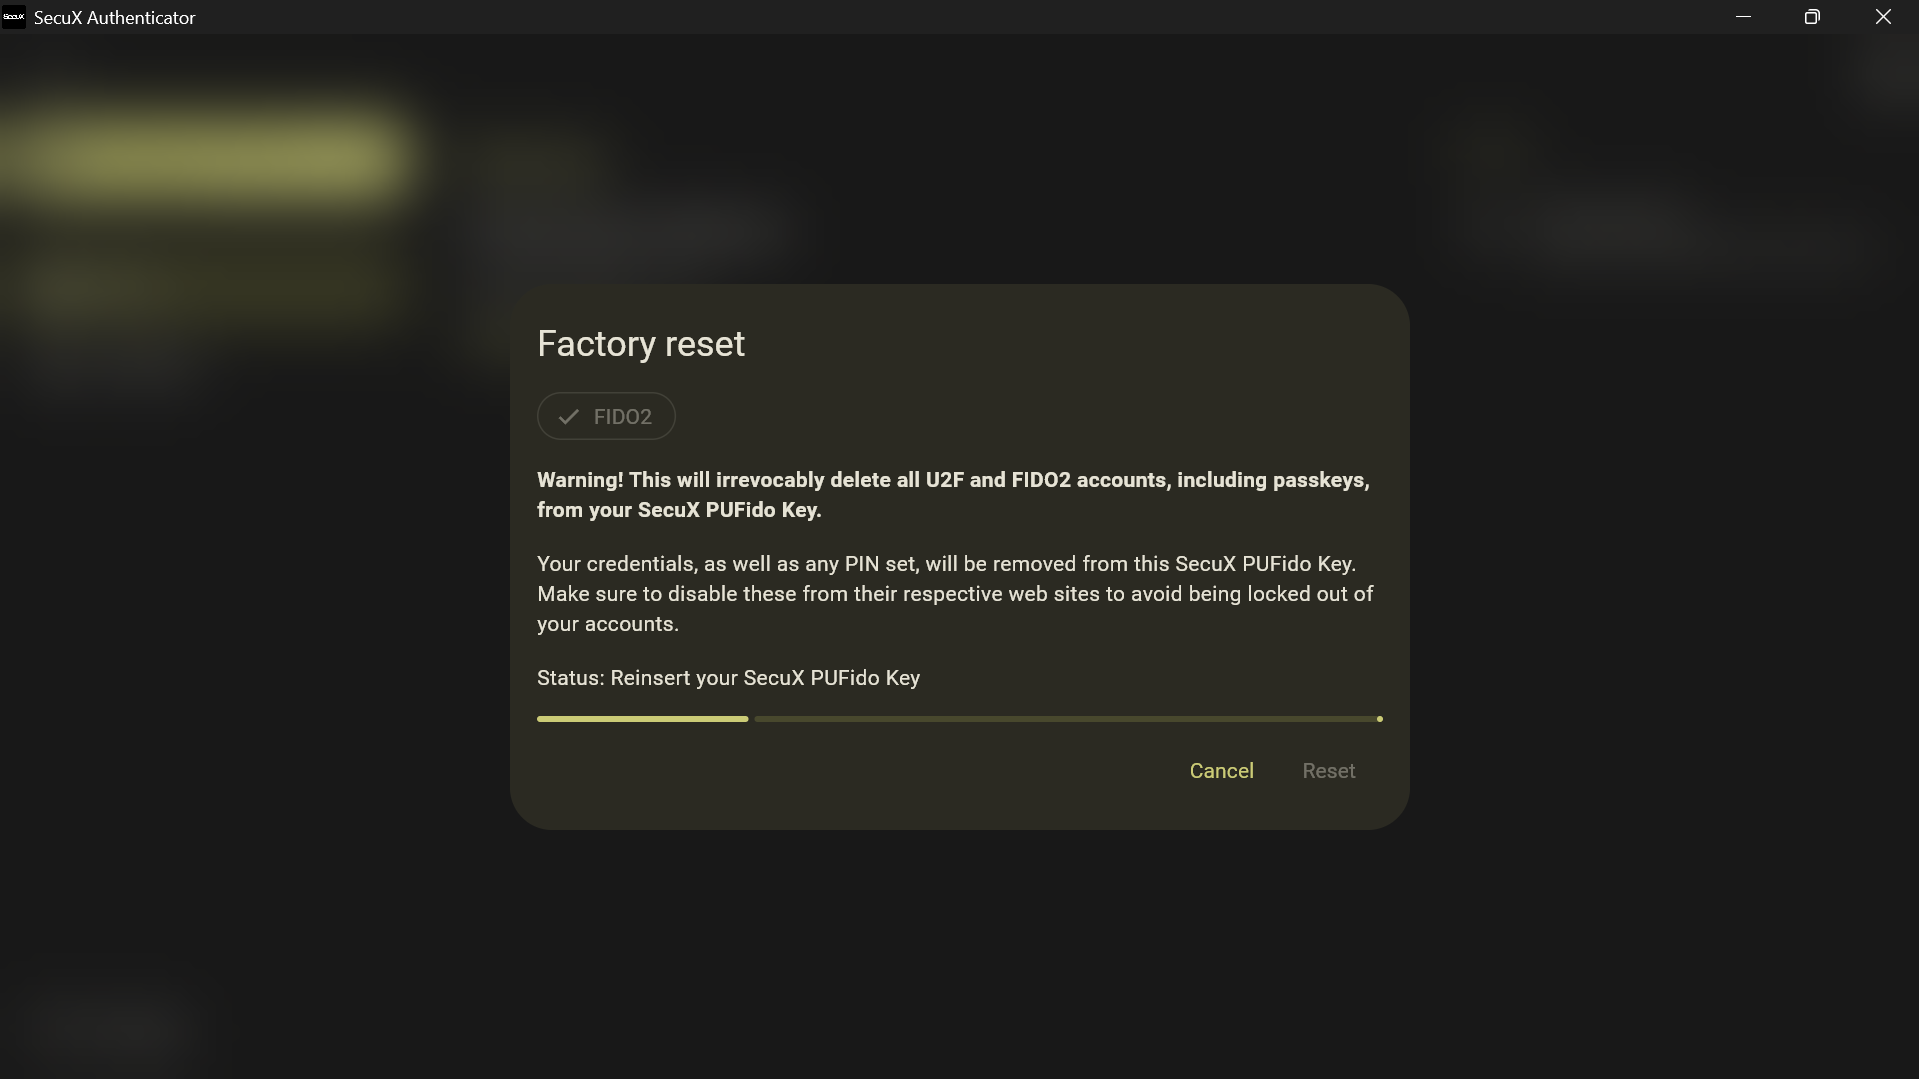
You may be prompted to:
- Unplug the device
- Reinsert the device
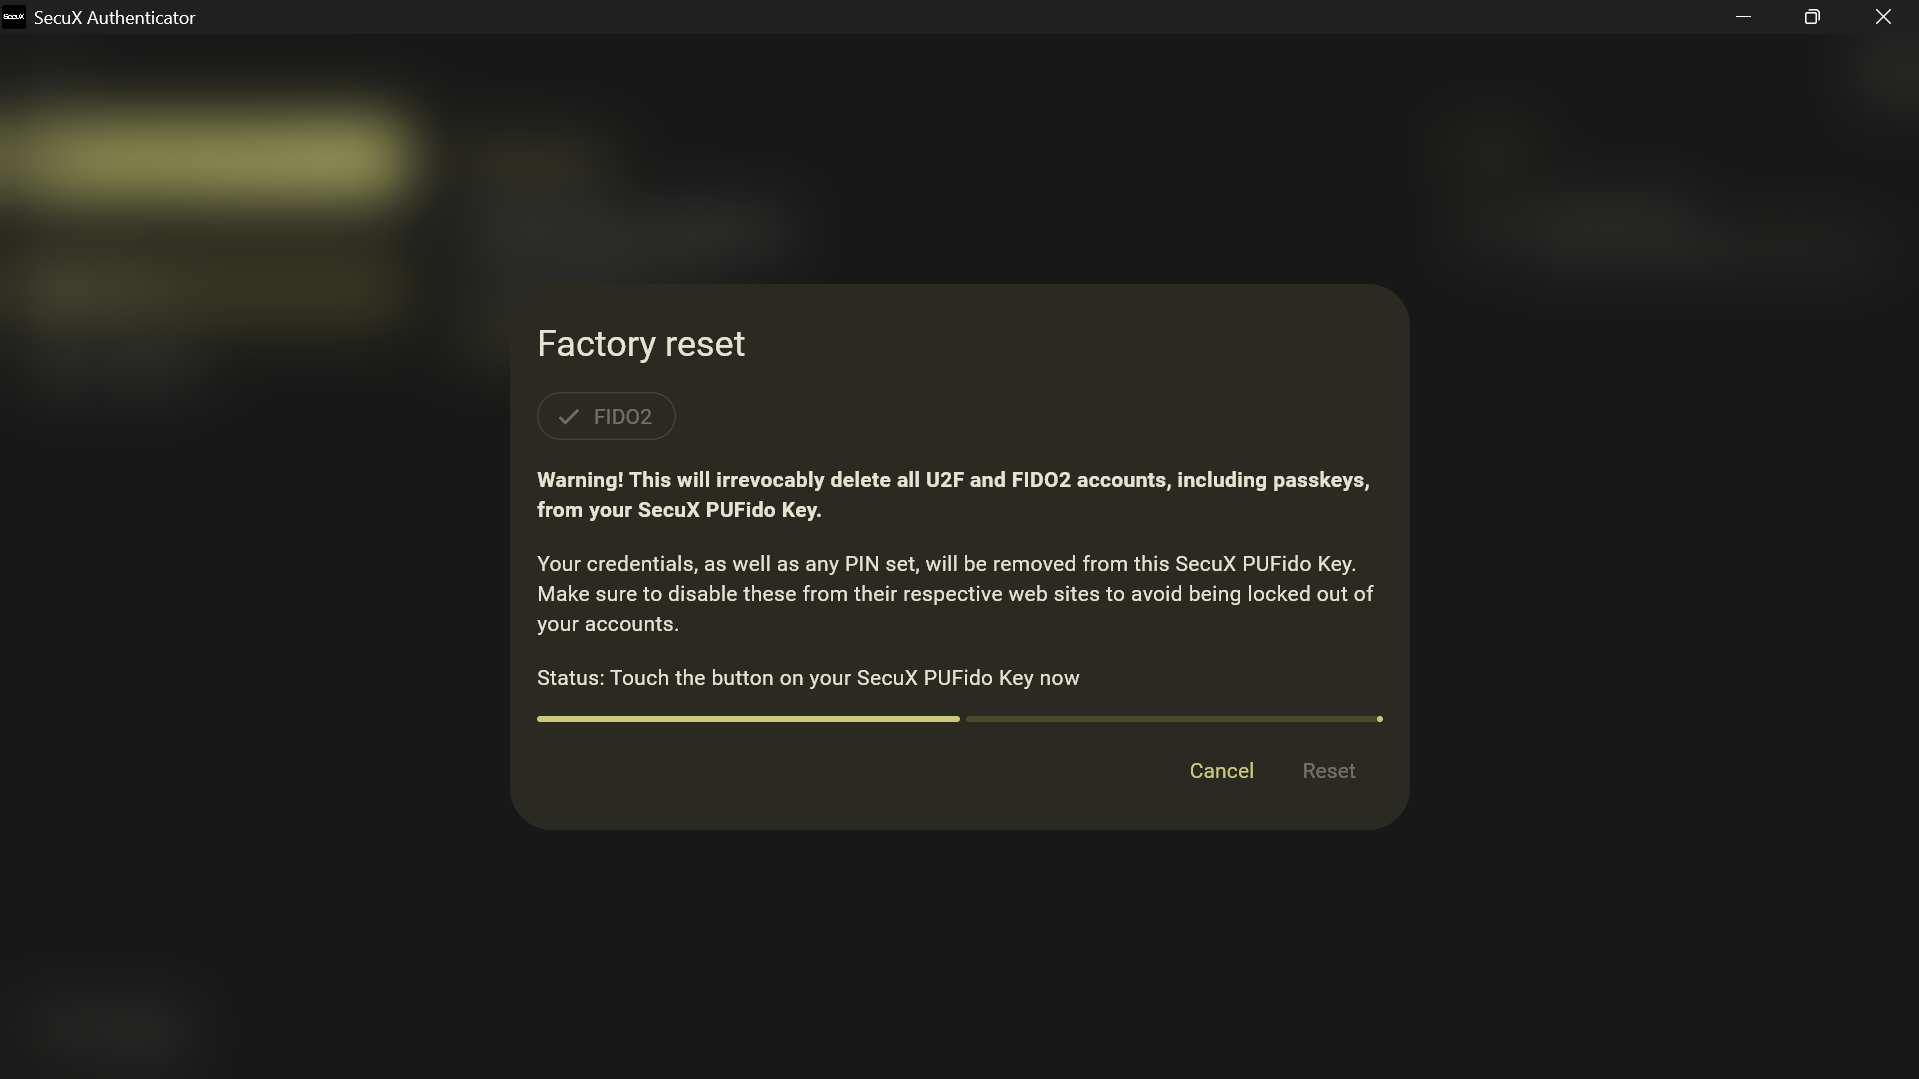
- Confirm the reset operation
Once the reset process finishes, the device will restart in factory state.
Reconfigure the Device After Reset
After a factory reset, the key behaves like a new device.
You will need to:
- Create a new device PIN
- Register new passkeys
- Configure settings again if necessary
Once configured, the key is ready to be used again for secure authentication across supported services.
Updated on 19 May 2026
What are your Feelings?
Thanks for your feedback.
Get 10% OFF
Sign up for our newsletter to receive 10%OFF and more discounts and offers!